Beadboard Wainscoting: 36-Inch vs 48-Inch vs 60-Inch Heights Compared
Choosing the right height for your Beadboard Wainscoting is the most critical decision when planning a wall renovation. Whether you are aiming for a classic cottage aesthetic or a modern protective layer for your home, the vertical scale dictates how your room feels to visitors.
Balancing the proportions of your wall panels against the height of your ceilings prevents the space from feeling cramped or disconnected. This breakdown helps you select the ideal measurement for your specific layout while ensuring the final result maintains a professional, architectural look.
Determining the Ideal Wainscoting Height
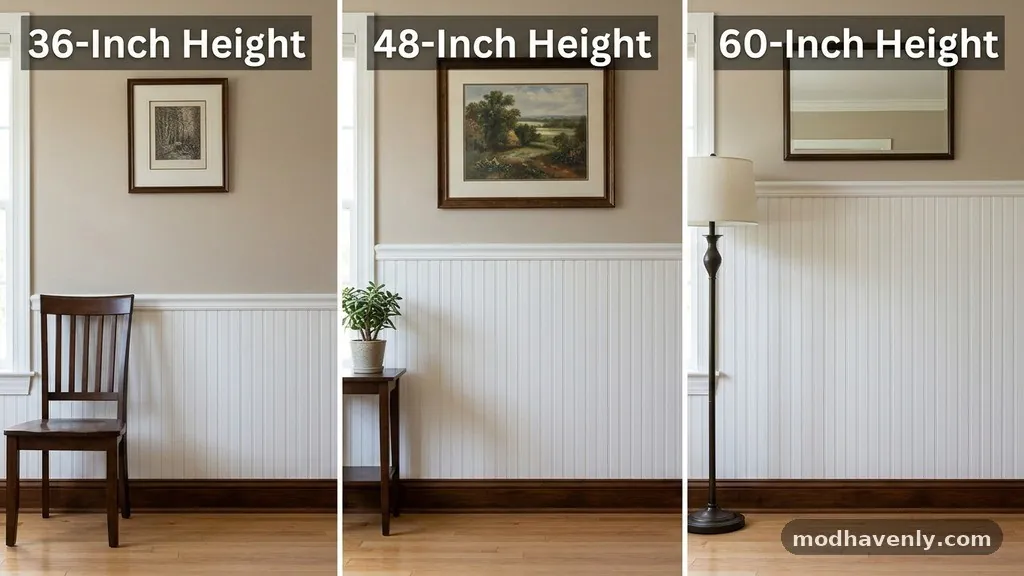
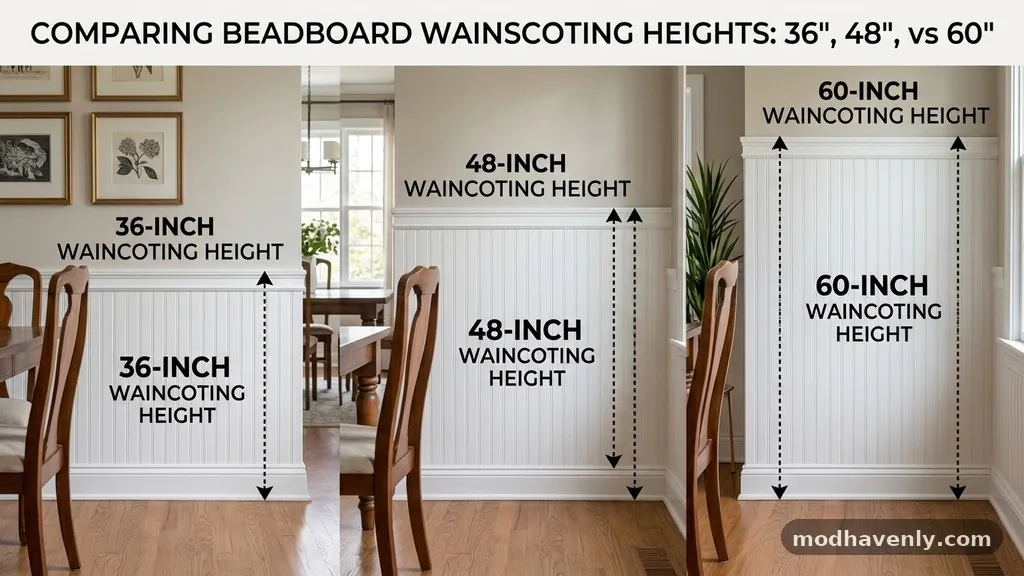
The standard height for most residential installations sits at 36 inches, but your ceiling height should be the ultimate guide for selecting between 36, 48, and 60 inches. A 36-inch height is the classic “chair rail” standard, which aligns perfectly with standard dining room chair heights to protect walls from scuffs. If you have 8-foot ceilings, this height maintains the traditional one-third wall rule that keeps a room feeling balanced.
When you move up to 48-inch panels, you are essentially hitting the halfway point of a standard room. This height is often chosen for bathrooms or mudrooms where extra protection against moisture or heavy traffic is necessary. Using a 48-inch panel on an 8-foot ceiling can make the room feel slightly more enclosed, which is often a desired effect in cozy, intimate spaces.
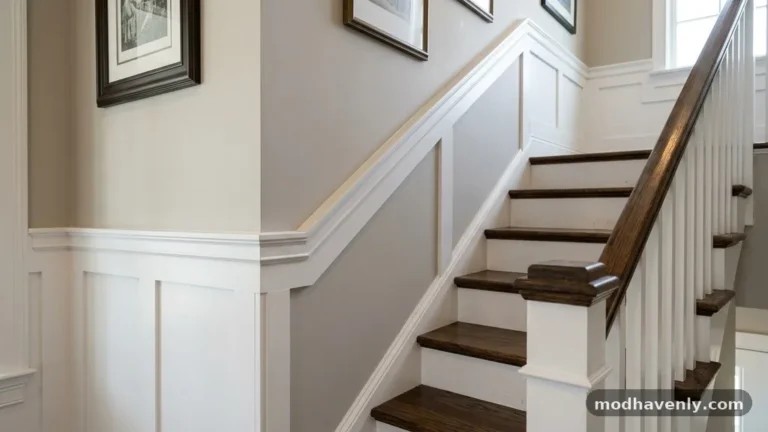
For 60-inch installations, you are moving into the realm of dramatic, high-impact design. This height is rarely used in standard living areas but serves as a functional and aesthetic anchor in hallways or staircases. It effectively covers more than half the wall, meaning your choice of paint or wallpaper above the rail becomes a secondary accent rather than the main feature.
Comparing Standard Height Specifications
Understanding the physical impact of these three common heights requires looking at how they interact with the rest of your home. The 36-inch option is the most versatile, fitting into almost any architectural style without overwhelming the room. It is the most common choice for DIYers because it requires less material and is easier to manage during the installation process.
The 48-inch height serves a more utilitarian purpose in high-traffic zones. It acts as a visual divider that forces the eye to stop at the middle of the wall, which can help break up long, empty stretches in a hallway. However, it requires more precision during installation to ensure the top rail remains perfectly level across the entire perimeter of the room.
At 60 inches, you are making a bold design statement. This height is often used in rooms with 10-foot ceilings or higher, where a 36-inch rail would look lost and insignificant. It provides a substantial barrier for walls in narrow spaces like corridors, where the risk of chairs or bags hitting the paint is significantly higher than in a living room.
| Height | Best Use Case | Ceiling Compatibility |
|---|---|---|
| 36 Inches | Living rooms, dining areas | 8-foot ceilings |
| 48 Inches | Bathrooms, mudrooms, hallways | 8-foot or 9-foot ceilings |
| 60 Inches | Stairwells, high-ceiling entries | 9-foot or 10-foot ceilings |
The Role of Ceiling Height in Your Decision
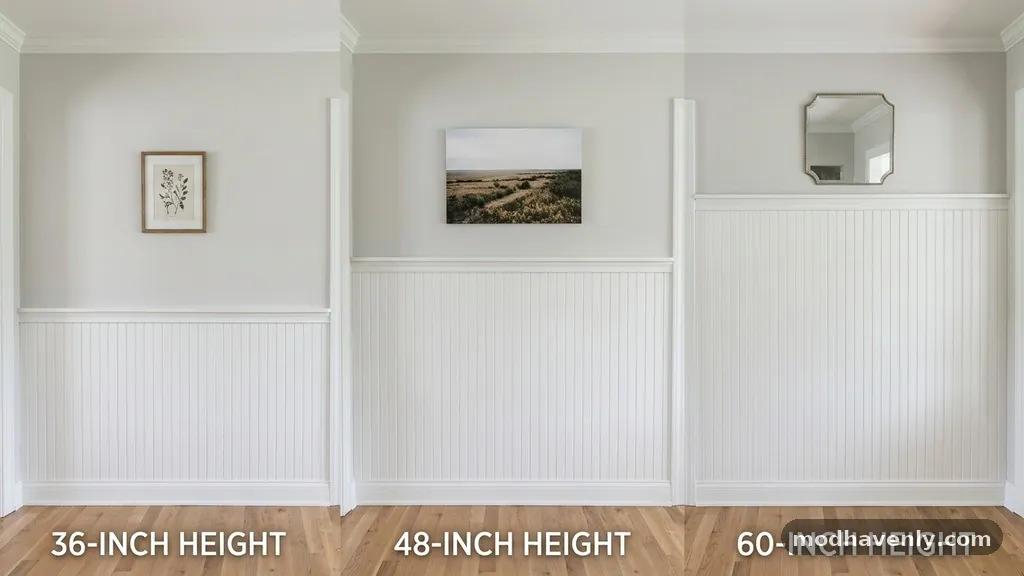
Your ceiling height is the anchor for your design choices. A general rule of thumb is that the wainscoting should not exceed one-third to one-half of the total wall height. If you have 8-foot ceilings, a 36-inch installation represents roughly 37% of the wall, which is widely considered the “sweet spot” for traditional interior design.
If you have 9-foot or 10-foot ceilings, a 36-inch board might appear too low or “stunted.” In these taller rooms, the 48-inch or 60-inch options provide the necessary visual weight to ground the space. Without this adjustment, the room can feel top-heavy, as the large expanse of empty wall above the rail draws too much focus.
Consider the sightlines from doorways and adjacent rooms. If you have an open-concept floor plan, you must ensure that your chosen height remains consistent across the connected areas. Jumping between different heights in the same field of vision creates a disjointed look that disrupts the flow of your home.
Advantages of 36-Inch Wainscoting
The primary advantage of the 36-inch height is its timeless, unobtrusive nature. It is the gold standard for traditional wainscoting and is widely available in pre-fabricated MDF or wood panels. Because it is so common, finding matching rails, baseboards, and trim pieces is simple and cost-effective.
This height is perfect for homeowners who want to introduce texture without changing the color scheme of the entire room. You can paint the beadboard a crisp white while keeping the walls a different color, creating a clean, classic contrast. It is also the most forgiving height for installation, as minor imperfections in floor leveling are less noticeable at this scale.
Using 36-inch panels also leaves you with more wall space for art and decor. You can hang mirrors, pictures, or sconces above the rail without feeling like you are fighting against the architectural elements of the room. It is a subtle upgrade that adds character without demanding all the attention.
When to Choose 48-Inch Panels
Choosing 48-inch panels is a decision rooted in both aesthetics and practicality. In a bathroom, this height provides a significant barrier against water splashes and humidity, especially if you use moisture-resistant MDF or PVC materials. It creates a “wainscoted room” look that feels more finished and intentional than a simple 36-inch rail.
This height is also excellent for mudrooms where you need protection from muddy boots, wet coats, and heavy traffic. By installing panels up to 48 inches, you protect the majority of the wall surface that is prone to everyday wear. It essentially turns your wall into a durable, wipeable surface that can handle the chaos of a busy household.
Visually, 48 inches can make a room feel cozier. If you have a large bedroom with high ceilings that feels cold or uninviting, this height can help bring the visual plane down. It creates a sense of enclosure that can make a large, cavernous space feel much more comfortable and intimate.
The Bold Impact of 60-Inch Wainscoting
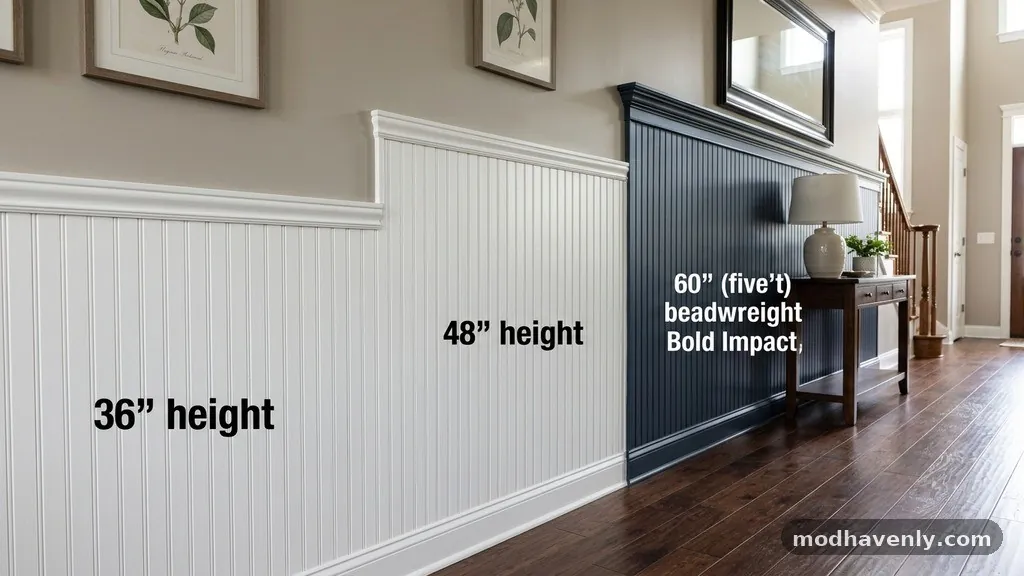
A 60-inch height is for those who want their wall treatment to be a primary design feature. It is a dramatic choice that works exceptionally well in older homes with high ceilings or in narrow hallways that need a strong focal point. Because it covers more than half the wall, it changes the entire character of the room.
This height is particularly effective in staircases, where the angle of the stairs can make shorter wainscoting look awkward. By extending the panels to 60 inches, you create a long, continuous line that follows the path of the stairs, smoothing out the visual transition. It acts as a structural element that defines the movement through the home.
However, you must be careful with color selection at this height. A dark or bold color on 60 inches of wall can make a room feel smaller or more claustrophobic. If you choose this height, consider using lighter, neutral tones to keep the room feeling airy, or be prepared to commit to a moody, dramatic aesthetic.
Material Considerations for Different Heights
The material you choose often dictates how easily you can customize the height of your wainscoting. MDF is the most common choice for these projects because it is affordable and provides a smooth surface for painting. If you are buying 8-foot sheets of beadboard, a 48-inch height is very efficient, as you can cut one sheet in half to get two 48-inch sections with minimal waste.
Solid wood is another option, though it is more expensive and prone to expansion and contraction. If you are working with tongue-and-groove boards, you can technically build your wainscoting to any height you desire. This gives you the ultimate flexibility, especially if you have uneven floors that require a custom scribe at the bottom.
PVC is the best choice for high-moisture areas like bathrooms or laundry rooms. While it is more expensive than MDF, it will not rot or warp when exposed to water. Most PVC beadboard comes in pre-cut heights, so verify the available sizes before you commit to a specific design plan.
Common Installation Mistakes to Avoid
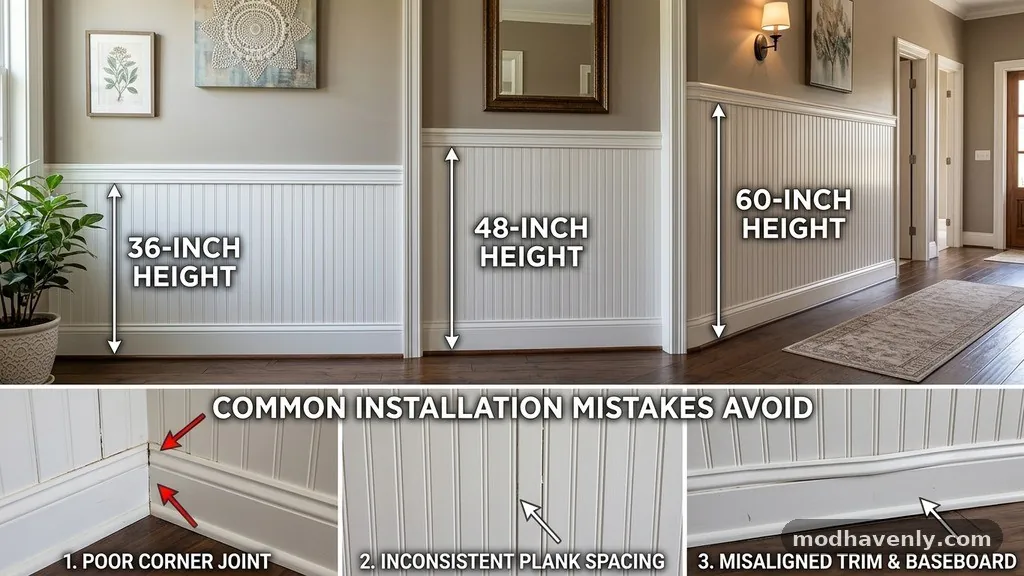
One of the biggest mistakes people make is failing to account for the thickness of the baseboard. Your wainscoting height is typically measured from the floor to the top of the rail, not including the baseboard. If you don’t calculate this correctly, your finished height might end up an inch or two higher than you intended.
Ignoring the level of your floor is another common trap. In older homes, floors are rarely perfectly level, and if you simply measure 36 inches up from the floor at every point, your top rail will follow the slope of the floor. Always use a laser level to mark your top line around the entire room to ensure the rail stays perfectly horizontal.
Another frequent error is neglecting the transition at corners. When you meet an inside or outside corner, you need to ensure the beadboard panels are cut precisely so the pattern continues seamlessly. Using corner molding or a simple caulk finish can help mask minor gaps, but proper planning is the only way to get a professional, high-end look.
Essential Tools for a Professional Finish
* A high-quality laser level for marking your horizontal lines.
* A miter saw for clean, precise cuts on your top rails and trim.
* A brad nailer to secure the panels to the wall studs.
* Construction adhesive for extra grip on uneven wall surfaces.
* A stud finder to ensure your panels are anchored securely.
* Paintable caulk to fill gaps between the rail and the wall.
These tools are not just for convenience; they are essential for ensuring the longevity of your installation. Using a brad nailer instead of hammer and nails prevents the surface of the beadboard from being dented or damaged. A quality adhesive prevents the panels from shifting or pulling away from the wall over time, which is common in areas with temperature fluctuations.
Integrating Wainscoting into Modern Decor
Using beadboard doesn’t mean you are restricted to a “farmhouse” or “cottage” style. In modern homes, you can update the look by using a simple, clean-lined top rail instead of a heavy, decorative one. A flat, minimalist cap rail can make the traditional beadboard pattern feel contemporary and fresh.
The color you choose also plays a massive role in the final style. While white is the classic choice, painting the beadboard the same color as the wall can create a subtle, sophisticated texture that is very popular in high-end design. This “tone-on-tone” look adds depth to a room without the visual clutter of high-contrast trim.
Consider the scale of the bead itself. Wide-plank beadboard feels more modern and substantial, while narrow, traditional beadboard feels more historic and intricate. By matching the scale of the bead to the height of the wainscoting, you can create a cohesive look that feels intentional and well-designed rather than like an afterthought.
Frequently Asked Questions
Is beadboard wainscoting still in style in 2026?
Yes, it remains a staple in residential design because it adds texture and architectural interest to otherwise flat walls. While trends shift, the classic look of a well-installed wainscoting treatment is considered a timeless upgrade that adds value to a home.
Can I install wainscoting over drywall?
Absolutely, you can install it directly over drywall using construction adhesive and finish nails. Ensure the drywall is clean and dry first, and locate your studs so you can anchor the top and bottom rails securely into the wall framing.
Does wainscoting make a small room look smaller?
If you choose a dark color or a very high wainscoting, it can make a room feel more enclosed. However, using a 36-inch white wainscoting in a small room often has the opposite effect, as it adds horizontal lines that can make the space feel wider and more structured.
What is the best way to handle outlets and light switches?
You will need to use electrical box extenders to bring your outlets and switches flush with the new surface of the beadboard. Never bury an electrical box behind the paneling, as this is a fire hazard and violates most local building codes.
Can I use beadboard in a kitchen?
It is a great choice for kitchen breakfast nooks or dining areas to protect the walls from chairs. If you plan to use it near a sink or prep area, opt for PVC or high-quality moisture-resistant MDF to prevent swelling from water exposure.
Final Thoughts on Your Wainscoting Project
Selecting the right height for your Beadboard Wainscoting is the single most effective way to influence the character of your interior space. By considering your ceiling height, the function of the room, and the overall aesthetic you want to achieve, you can confidently choose between 36, 48, or 60 inches. Remember that professional installation relies on careful preparation, from using a laser level to ensuring your electrical boxes are correctly extended.
Whether you are looking to protect high-traffic areas or simply want to add a layer of classic design to your home, this wall treatment offers a durable and timeless solution. Take your time with the planning phase, measure your walls twice, and don’t hesitate to experiment with paint colors to make the look your own. Your walls are a blank canvas, and with the right height, you can transform the entire feel of your living space.