
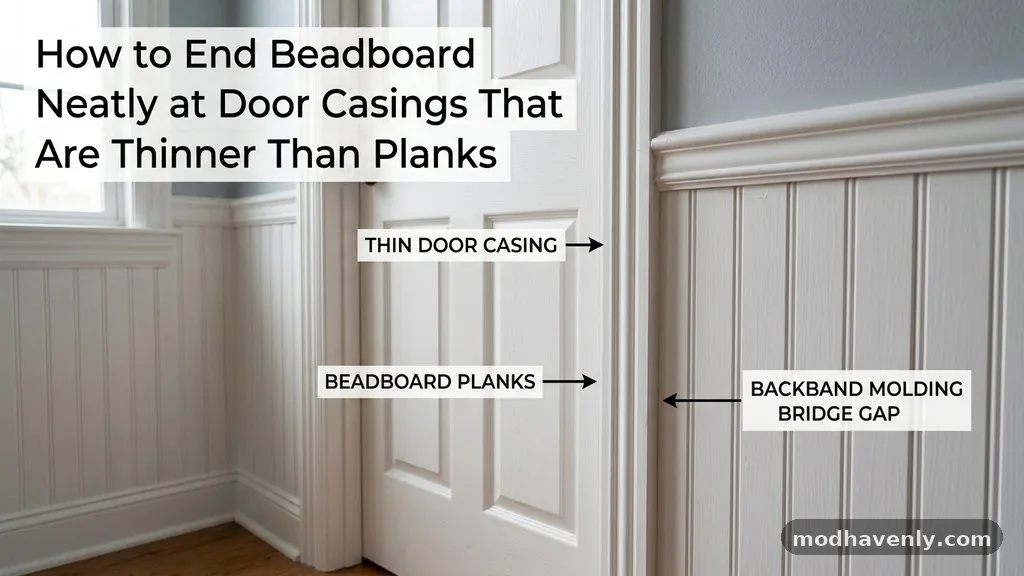
How to End Beadboard Neatly at Door Casings That Are Thinner Than the Planks
Successfully ending beadboard neatly at door casings that are thinner than the planks requires a strategic approach to trim selection and installation. When your paneling projects past the edge of the door trim, the resulting visual gap creates an unfinished look that undermines the quality of your renovation. You can resolve this by using specific transition moldings, building out the casing, or applying a decorative cap to bridge the thickness difference.
These methods ensure a professional, flush finish that integrates the wall paneling with the architectural features of your room. Mastering these techniques will elevate your woodworking results and provide a clean transition that respects the existing trim profile.
Using Backband Molding to Bridge the Gap
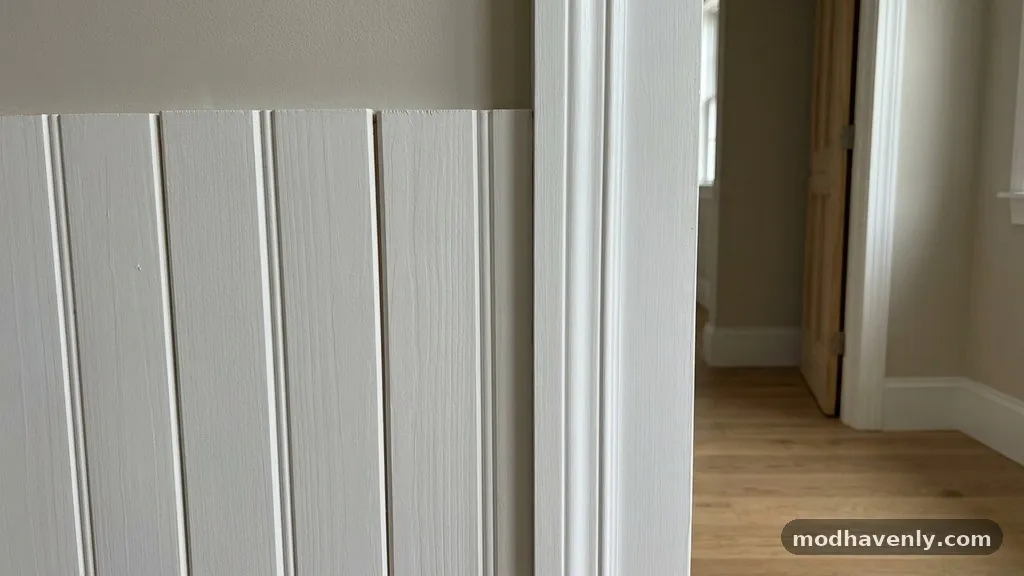
The most effective way to address the depth discrepancy is by installing a backband molding around the door casing. A backband is a secondary piece of trim that wraps around the outer edge of existing casing to add both width and depth.
By applying this to your door frame, you essentially thicken the casing until it sits flush with or slightly proud of the beadboard paneling. This creates a substantial, high-end look that mimics the appearance of original colonial-style millwork.
To install this, you will need to measure the total thickness of your beadboard and any substrate or adhesive used behind it. Purchase a backband profile that matches the wood species and style of your existing door trim.
Once installed, the beadboard will butt directly into the side of the backband rather than the thinner casing underneath. This transition hides the raw edge of the paneling and provides a solid, square surface for caulking or painting.
Applying a Decorative Stop or Batten
If you prefer a simpler solution, you can use a narrow piece of flat stock or a decorative batten to cover the exposed edge. This method involves running a thin strip of wood vertically along the side of the door casing where the beadboard terminates.
The strip should have the same thickness as the beadboard paneling plus any furring strips used behind it. By painting this strip to match the casing, you create a built-in look that frames the door frame.
This technique is particularly useful if your beadboard is already installed and you cannot easily remove it to add thicker casing. You can cut the batten to length and secure it with finish nails and wood glue.
Sand the surface until it is smooth and flush with both the door casing and the paneling. Applying a high-quality wood filler to any nail holes will make the addition appear as though it were part of the original door assembly.
Building Out the Door Jamb
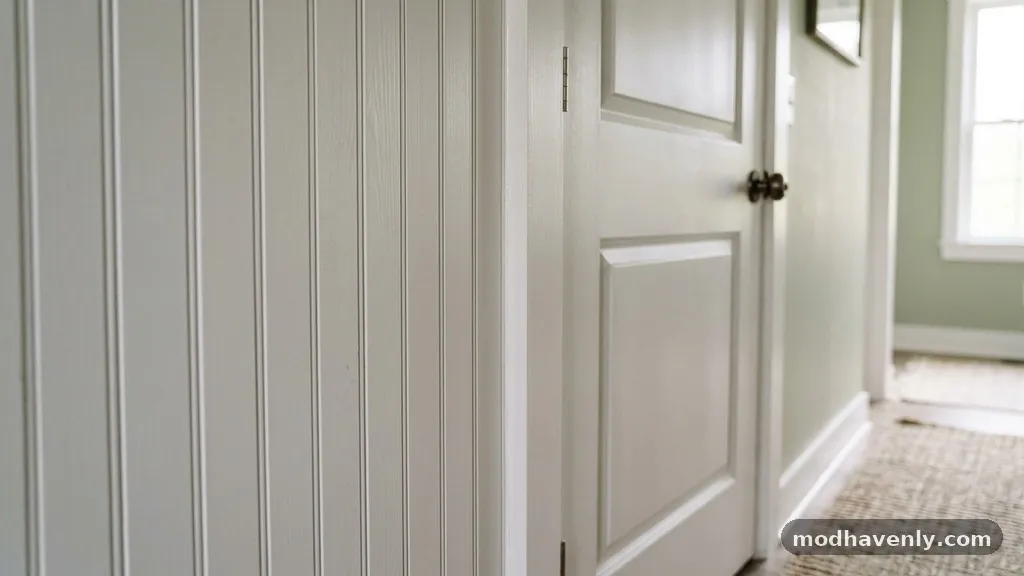
When the beadboard is significantly thicker than the casing, you may need to extend the door jamb itself. This is a more involved process but provides the most permanent and structurally sound result.
You start by removing the existing casing to expose the door jamb and the rough opening behind it. You then attach a thin extension piece of wood to the edge of the jamb to bring it out to the level of the finished wall.
Once the jamb extension is secure, you can reinstall your original casing or install new, thicker trim that covers the seam between the extension and the jamb. This approach is ideal for historic homes where maintaining the integrity of original architectural details is a priority. It ensures that the door casing sits perfectly on the wall plane, regardless of the thickness of the decorative paneling you have added.
Choosing the Right Transition Molding
Transition molding acts as a visual bridge between two surfaces of different depths. When dealing with paneling that sticks out further than your door trim, a small, rounded corner molding or a piece of scribe molding can be your best friend.
These profiles are designed to hide gaps and soften transitions between uneven surfaces. You simply nail the molding into the edge of the beadboard, allowing it to overlap the corner of the door casing.
Select a profile that complements the style of your home, such as a simple Ogee or a standard quarter-round. For a modern look, consider a square-profile molding that provides a clean, geometric line.
The key is to ensure the molding is flexible enough to follow the line of the door if it is slightly out of plumb. This method is fast, affordable, and requires minimal tools to achieve a clean result.
The Role of Plinth Blocks
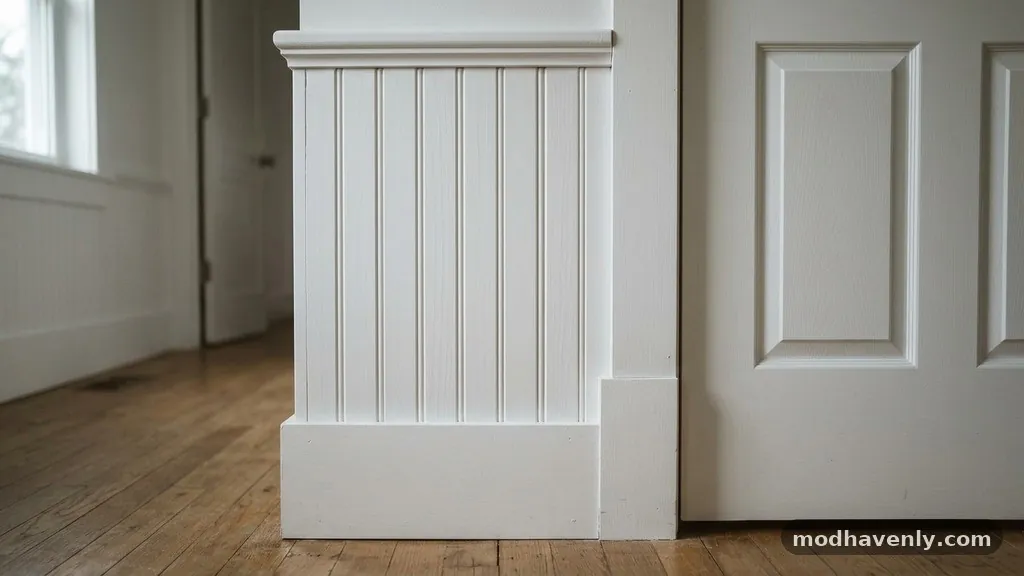
Plinth blocks are thick, square blocks of wood placed at the base of a door casing. They are traditionally used to transition between door trim and baseboards, but they are also a secret weapon for ending beadboard.
Because plinth blocks are naturally thicker than standard door casing, they provide a perfect stopping point for your paneling. You can run your beadboard directly into the side of the plinth block, hiding the edge entirely.
If you use this method, ensure the plinth block is thick enough to cover the full profile of the beadboard. If the paneling is still slightly thicker, you can chamfer the edge of the beadboard where it meets the block.
This creates a subtle shadow line that looks intentional and professional. Plinth blocks add a touch of classic elegance to any room and simplify the trim work significantly.
Working with Existing Trim Profiles
Sometimes you can avoid the thickness issue by slightly modifying the edge of your beadboard. If the difference in depth is only an eighth of an inch or less, you can use a block plane to taper the edge of the paneling.
This creates a slight bevel that draws the eye toward the casing rather than highlighting the mismatch in depth. This is a subtle trick that works well when you want to keep the installation as low-profile as possible.
Before you begin, test the taper on a scrap piece of beadboard to ensure the angle looks natural. You want the transition to be gradual enough that it is not obvious to the casual observer.
After tapering, sand the edge thoroughly to remove any splinters from the tongue-and-groove joint. A coat of primer and paint will help unify the beveled edge with the rest of the wall surface.
Strategic Placement and Planning
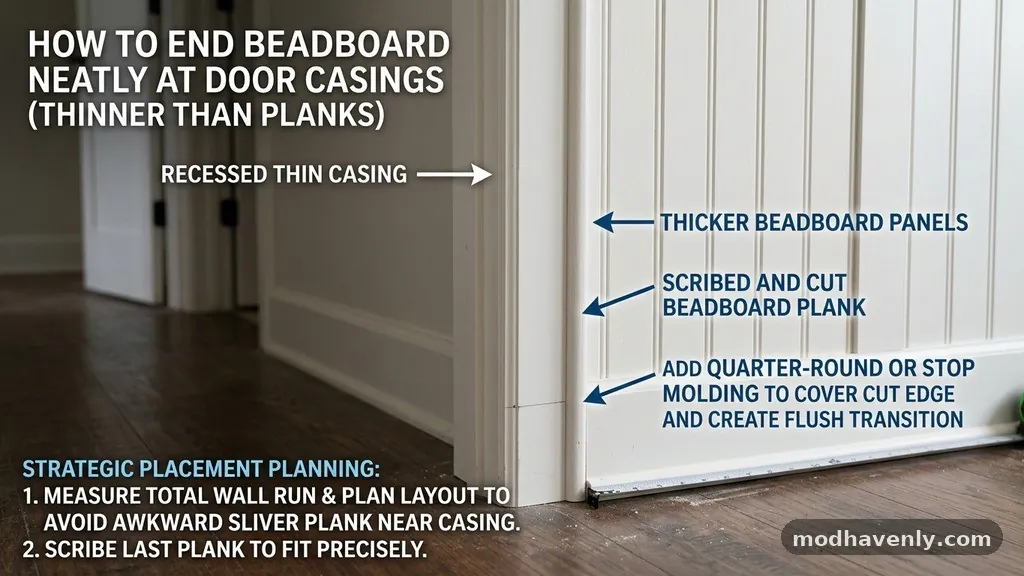
The best way to handle this issue is to plan for it before you begin your installation. If you know your beadboard is thicker than your trim, you can install thin furring strips behind your casing to bring it out.
This involves prying the casing off the wall, adding a layer of thin plywood or cardboard shims, and nailing the casing back into place. This is a proactive approach that saves you from having to troubleshoot the transition at the end of the project.
Planning ahead also allows you to choose your beadboard material based on its thickness. Some vinyl or PVC options are thinner than traditional tongue-and-groove wood, which might be a better fit for your specific door casings.
Compare the thicknesses of different materials before you buy your supplies. Taking these measurements upfront ensures a much smoother installation process.
Comparing Common Transition Methods
Different situations call for different solutions depending on your budget, skill level, and the desired aesthetic. The following table compares the most common ways to address thickness differences when installing wall paneling.
| Method | Ease of Installation | Visual Impact | Cost |
|---|---|---|---|
| Backband Molding | Moderate | High (Classic) | Medium |
| Batten/Flat Strip | Easy | Low (Simple) | Low |
| Plinth Blocks | Moderate | High (Elegant) | Medium |
| Jamb Extension | Difficult | High (Permanent) | High |
Common Tools Needed for the Job
To achieve a clean finish, you need the right set of tools for cutting and fastening trim. You should have a sharp miter saw for making precise corner cuts on your moldings.
A cordless finish nailer makes attaching thin battens or backbands much faster and cleaner than using a hammer. Always keep a set of high-quality wood chisels on hand for small adjustments to the door jamb or casing.
Other essential supplies include a good caulk gun, high-quality wood filler, and a sanding block for smoothing edges. Using a flexible, paintable caulk to fill the final seam between the molding and the door casing is essential for a seamless look.
Without this final step, even the most precise cuts will show small gaps as the house settles over time. Keep a clean damp cloth nearby to wipe away excess caulk before it dries.
Tips for a Professional Finish
The secret to making your work look like it was done by a professional is in the final finishing steps. Always fill your nail holes with wood filler and sand them flush before painting.
If you are staining the wood, use a filler that matches the wood species exactly to ensure the repair is invisible. Never skip the priming step, as raw wood edges will absorb paint differently than the finished surface of the trim.
Pay attention to your caulk lines, keeping them thin and consistent. Thick, gloppy caulk is a dead giveaway that the trim work was an afterthought.
Use masking tape to get crisp lines when applying caulk or paint. If you are working in a high-traffic area, consider using a durable semi-gloss paint that can handle bumps and cleaning over the years.
Frequently Asked Questions
Should I remove the door casing before installing beadboard?
It is generally recommended to remove the casing if you are using thick beadboard. Removing the trim allows you to slide the paneling behind it, which creates a much cleaner look. You can then reinstall the casing over the edge of the beadboard, hiding the cut edge completely.
What if I cannot remove my door casing?
If the casing is stuck or painted over, you can use the backband or batten method instead. These techniques allow you to work around the existing trim without causing damage to the wall or the door frame. Just ensure you measure the depth carefully so your chosen trim covers the paneling edge.
Can I use caulk to hide the gap instead of molding?
You can use caulk for very small gaps, but it is not recommended for larger differences in thickness. Caulk is prone to shrinking and cracking if it is applied too thickly. Adding a piece of molding is a more durable and aesthetically pleasing long-term solution.
How do I handle the transition at the floor?
If you are ending your paneling at the floor, use a baseboard or a piece of base cap molding to cover the bottom edge. This transition should be handled similarly to the door casing by ensuring the baseboard is thick enough to cover the beadboard. If necessary, use a plinth block to bridge the gap between the baseboard and the door trim.
Is it better to use wood or PVC beadboard?
Wood beadboard is traditional and easier to sand and shape, while PVC is moisture-resistant and ideal for bathrooms. PVC can be more difficult to paint and does not respond to wood filler as well as natural wood. Choose the material based on the room’s humidity levels and your willingness to maintain the finish.
Conclusion
Successfully ending beadboard neatly at door casings that are thinner than the planks is a manageable task with the right strategy and preparation. By selecting the appropriate trim profile or building out your existing jambs, you ensure that your wall paneling transitions into the door frame with a clean, intentional look. Whether you choose the classic elegance of plinth blocks or the straightforward utility of a backband, these methods will hide inconsistencies and provide a high-quality finish.
Take your time with the measurements and focus on the final finishing details to ensure the project meets your standards. Once the paint is dry and the caulk is set, these small, deliberate details will make your interior woodwork stand out for all the right reasons. Feel free to reach out if you have further questions on your specific trim configuration.