How to Transition Chair Rail Trim Down a Slanted Staircase Wall
Successfully transitioning Chair Rail Trim Down a Slanted Staircase Wall requires more than just a standard miter saw setup. Achieving a professional look depends on your ability to calculate compound angles that reconcile the horizontal plane of your hallway with the steep pitch of your staircase. By mastering the geometric relationship between the rake of the stairs and the level wall, you can create a clean, intentional flow that enhances your home’s architecture.
This process is entirely achievable for a DIY enthusiast with the right approach to measuring and cutting. Follow these steps to ensure your molding looks intentional rather than like an afterthought.
Calculating the Transition Angle
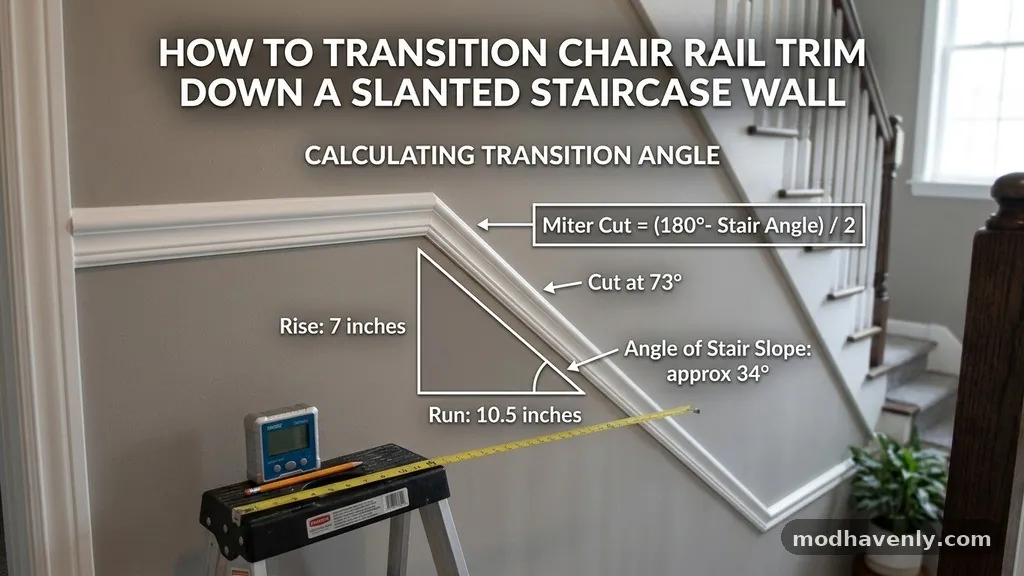
The most common mistake when working on this project is assuming the angle of the stair rail is the same as the miter setting on your saw. You must first determine the pitch of your staircase by measuring the rise and run of your stairs.
A standard staircase usually has a pitch between 30 and 37 degrees, but every home varies. Use a digital angle finder to get an exact reading where the horizontal wall meets the diagonal slope.
Once you have that slope measurement, you need to calculate the miter and bevel settings. Most molding profiles require a compound cut when moving from a flat wall to a sloped one.
If you are using a simple flat chair rail, you might only need a single miter cut. However, complex profiles will demand that you tilt the board on the saw bed to match the slope.
Record your measured angle on a piece of scrap wood before touching your finish material. It is much cheaper to waste a four-inch piece of pine than a ten-foot length of expensive trim.
Always verify the fit against the wall at the transition point. If the gap is too large, adjust your miter by half a degree at a time.
Tools Required for Precision
You cannot rely on a standard hand saw for this work if you want a tight seam. A compound miter saw is the industry standard for this task because it allows you to adjust both the blade angle and the bevel simultaneously. Ensure your blade is sharp and designed for finish carpentry to prevent splintering the wood.
A digital angle finder is an essential investment for this specific project. While a traditional protractor works, digital versions eliminate the guesswork when dealing with odd-degree slopes.
You should also have a high-quality coping saw on hand for the internal corners. Even if you use a miter saw for the main cuts, a coping saw allows you to fine-tune the fit at the transition point.
Keep a supply of wood filler and a sanding block nearby for those inevitable micro-gaps. No matter how precise your cuts are, walls are rarely perfectly plumb or flat. You will likely need to caulk the seam between the molding and the wall to achieve a truly professional finish.
Preparing the Wall Surface
Before you install any trim, you must ensure the wall is ready to accept the material. Remove any existing baseboard or obstructions that might interfere with the new rail.
Use a stud finder to locate the structural members behind the drywall. Marking these studs with a light pencil line will save you significant frustration during the installation phase.
If the wall is uneven, you may need to shim the back of the molding. A small gap behind the rail can cause the board to flex when you drive in a nail, which will crack your paint or wood finish.
Check for drywall bumps as well. Sanding down any high spots is much easier than trying to force the molding to conform to them.
Finally, prime the wall area where the rail will sit. If you are installing painted trim, it is often easier to paint the wall section behind the rail before the installation. This prevents you from having to perform delicate detail work with a brush once the rail is secured in place.
The Mechanics of the Transition
The point where the horizontal rail meets the slanted rail is the focal point of the entire installation. You are essentially creating a “transition block” or a complex mitered joint.
Most professionals prefer to use a transition block if the profile of the molding is too complex to miter perfectly. This involves installing a small square piece of wood at the corner to act as a bridge.
If you prefer a seamless look without a block, you must use a scarf joint or a compound miter. This requires cutting the end of the horizontal rail at an angle that meets the diagonal slope exactly.
You will need to hold the molding at the same angle on your saw as it will sit on the wall. This is known as “cutting in position.”
Practice this specific joint on scrap pieces until you can achieve a gap-less fit. If the joint is slightly off, the eye will immediately be drawn to it. A tight joint, however, will appear as if the board is one continuous piece of wood flowing down the stairs.
Measuring and Cutting Techniques
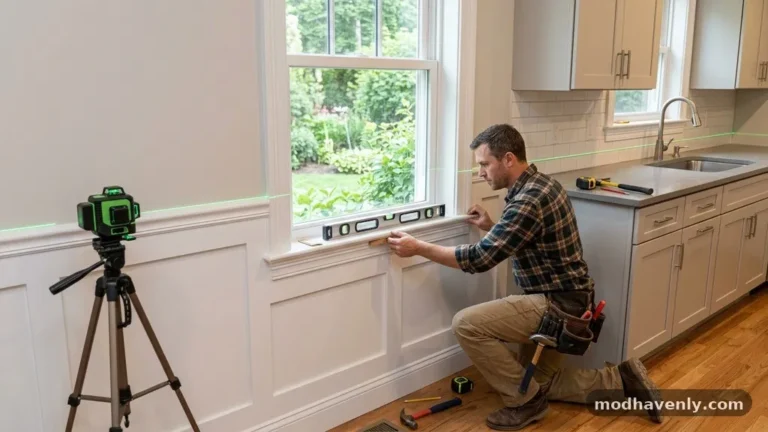
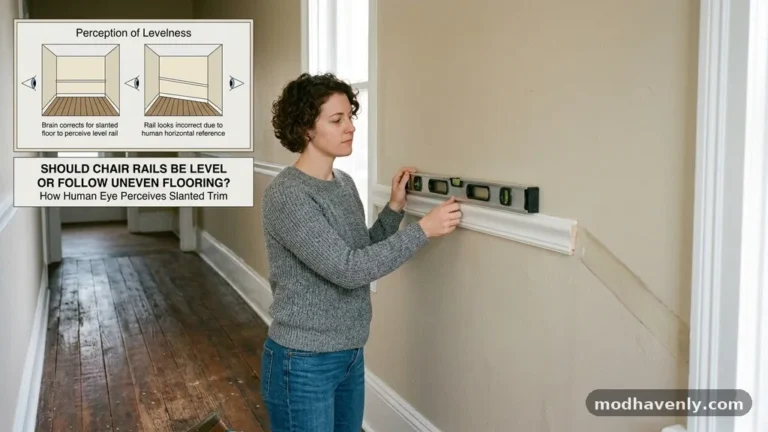
Accuracy in measurement is the foundation of a successful trim project. Do not rely on a tape measure alone; use a story pole or a long level to mark the height of your rail at various points along the wall.
Consistency is key when transitioning from the hallway to the staircase. If the rail height fluctuates even by a quarter-inch, the transition will look crooked.
When you cut the molding, always leave the board slightly long and trim it down to the final size. It is much easier to remove a tiny amount of material than it is to add length to a board that was cut too short.
Use a sharp utility knife to score the wood if you are performing a complex cope cut. This prevents the wood fibers from tearing during the sawing process.
Remember to account for the thickness of the blade, which is known as the “kerf.” Always cut on the waste side of your pencil line. If you cut directly on the line, you will lose the width of the blade, which could make your piece too short.
Working with Different Molding Profiles
Not all chair rail profiles are created equal. Some are simple, flat boards, while others feature intricate curves and deep relief patterns.
A flat profile is the easiest to transition because it does not require complex bevels. Simply measure the angle of the slope and cut your miter accordingly.
More decorative profiles, such as those with a prominent “crown” shape, are significantly harder to work with. These require you to calculate the “spring angle” of the molding.
The spring angle is the angle at which the molding sits away from the wall. You must account for this when setting your miter saw to ensure the profiles align correctly at the transition point.
If you find yourself struggling with a complex profile, consider using a simpler, smaller board at the transition point. You can also look into pre-made transition pieces available at the National Park Service’s guidelines on architectural detailing to see how historical homes handled these complex joints. While you may want a custom look, sometimes established techniques provide the most reliable results.
Installing the Rail Securely
Once your cuts are perfect, it is time to secure the molding. Use a finish nailer with 2-inch nails to attach the board to the wall studs.
If you cannot hit a stud, use high-quality construction adhesive along the back of the board. This is vital for long-term durability, especially in high-traffic areas like a staircase.
Apply a small bead of adhesive to the back of the board before placing it against the wall. Press it firmly into place and drive your nails at an angle.
This “toenailing” technique locks the board into the wall more effectively than driving nails straight in. Wipe away any excess glue immediately with a damp rag.
Check the alignment one last time before moving to the next section. If the rail is slightly off-level, you can often nudge it before the adhesive sets. Once the glue dries, the rail will be locked into place and very difficult to adjust.
Common Mistakes to Avoid
Many beginners try to force the molding to bend to the wall’s contour. Wood does not like to bend in two directions at once, and you will likely end up with cracks or a loose rail.
If the wall is truly wavy, you must scribe the back of the molding to fit the wall’s imperfections. This is a time-consuming process, but it yields the best results.
Another common error is ignoring the height of the chair rail relative to the furniture in the room. A standard height is about 32 to 36 inches from the floor.
However, on a staircase, you must ensure the rail doesn’t interfere with your hand as you walk up or down. Test the height by walking the stairs before you commit to the final installation.
Finally, never skip the sanding process. Even the best miter cuts will have tiny ridges that need to be smoothed out.
Use a fine-grit sandpaper to blend the joints. If you paint over rough, unsanded wood, the texture will be visible even from across the room.
Comparing Installation Methods
The method you choose for your transition will depend on your skill level and the tools available to you. Some methods are faster, while others offer a more refined aesthetic.
| Method | Difficulty | Aesthetic Result | Best For |
|---|---|---|---|
| Transition Block | Low | Traditional | Beginners |
| Compound Miter | High | Seamless | Experienced |
| Scribed Joint | Medium | Custom | Wavy Walls |
Each of these approaches has its place in home renovation. If you are working on a historic home, a transition block is often the most period-appropriate choice. If you prefer a modern, minimalist look, the compound miter is the way to go.
Essential Tips for Success
* Always buy 15% more material than you think you need to account for bad cuts.
* Use a high-quality wood filler that is paintable or stainable to hide nail holes.
* Keep your workspace clear of debris to prevent accidents on the stairs.
* Test your miter settings on scrap wood every single time you change the angle.
* Wear safety glasses, especially when using a power miter saw.
These small habits will significantly improve the quality of your work. The difference between a professional result and a DIY failure often comes down to patience and planning. Take your time, and do not rush the cutting phase.
FAQ
Is chair rail molding considered outdated?
While design trends shift, chair rail molding remains a classic element in many architectural styles. It serves a functional purpose by protecting walls from furniture, and it can add character to a plain room. When installed well, it is a timeless feature.
What is the 27-inch rule for stairs?
The 27-inch rule generally refers to the clearance required for comfortable passage on a staircase. While not a strict building code in all areas, maintaining at least this much space between the wall and the handrail or trim ensures the stairs remain functional. Always check your local building codes if you are modifying a structural element.
How do I modernize my staircase molding?
To modernize your staircase, consider using a simpler, cleaner profile for your rail. Painting the molding the same color as the wall creates a monochromatic, contemporary look. Removing ornate, traditional details in favor of simple geometric lines can also refresh the space.
Can I install chair rail on a slanted wall without a miter saw?
It is extremely difficult to achieve a professional result without a miter saw. A hand saw and miter box can be used, but the precision required for a slanted transition is very hard to maintain by hand. Renting or borrowing a power miter saw is highly recommended for this project.
What is the best height for a chair rail on stairs?
The height should generally match the height of the chair rail in the adjoining hallway or room. This creates a consistent visual line. If you are starting from scratch, 32 to 36 inches is a standard range, but ensure it feels comfortable and does not obstruct the stairwell.
Final Thoughts
Mastering the process of transitioning Chair Rail Trim Down a Slanted Staircase Wall is a rewarding carpentry project that pays off every time you walk up your stairs. By carefully calculating your angles and taking the time to test your cuts, you can achieve a look that feels like a natural part of your home. Remember that the secret lies in the preparation and the patience you apply to the joints.
Do not be discouraged if your first few cuts are not perfect; even professionals often need to adjust their settings to account for the unique quirks of a specific staircase. With the right tools and a methodical approach, you will end up with a clean, professional finish that lasts for years.
If you find yourself hitting a wall during the process, take a break, re-measure, and approach the next cut with fresh eyes. Your home will reflect the effort you put into every inch of that transition.