How High Should Beadboard Be in a Small Powder Room Behind the Toilet?
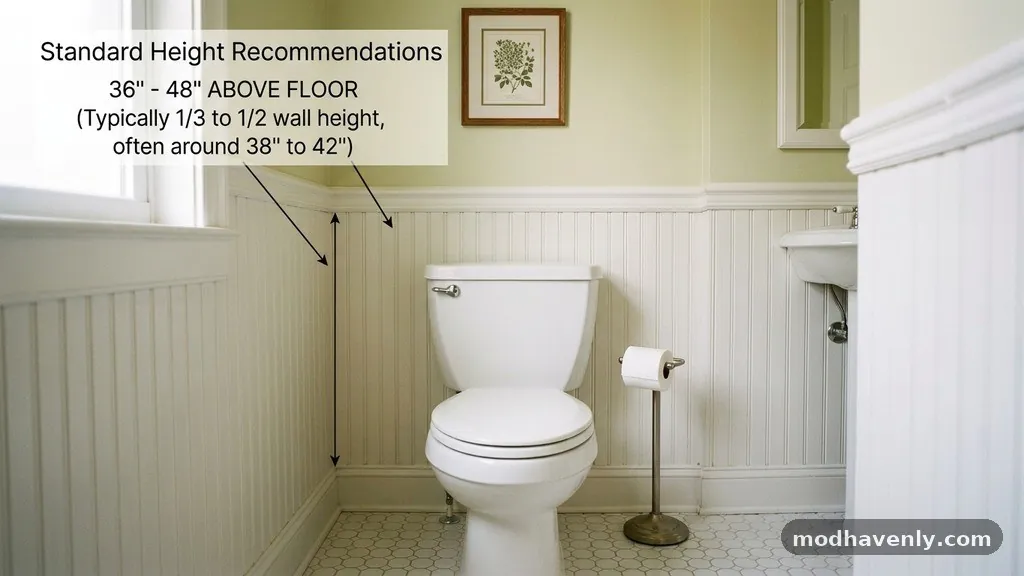
Determining how high should beadboard be in a small powder room behind the toilet requires balancing aesthetic proportion with practical protection. Most designers recommend installing beadboard at a height of 36 to 42 inches from the floor, as this range aligns perfectly with the standard height of pedestal sinks and toilet tanks.
In a confined space, selecting the right vertical dimension prevents the room from feeling cramped while ensuring the paneling serves its primary purpose of shielding walls from moisture and impact. This article explores the architectural considerations, visual impact, and installation logistics necessary to achieve a polished look in your home.
Standard Height Recommendations
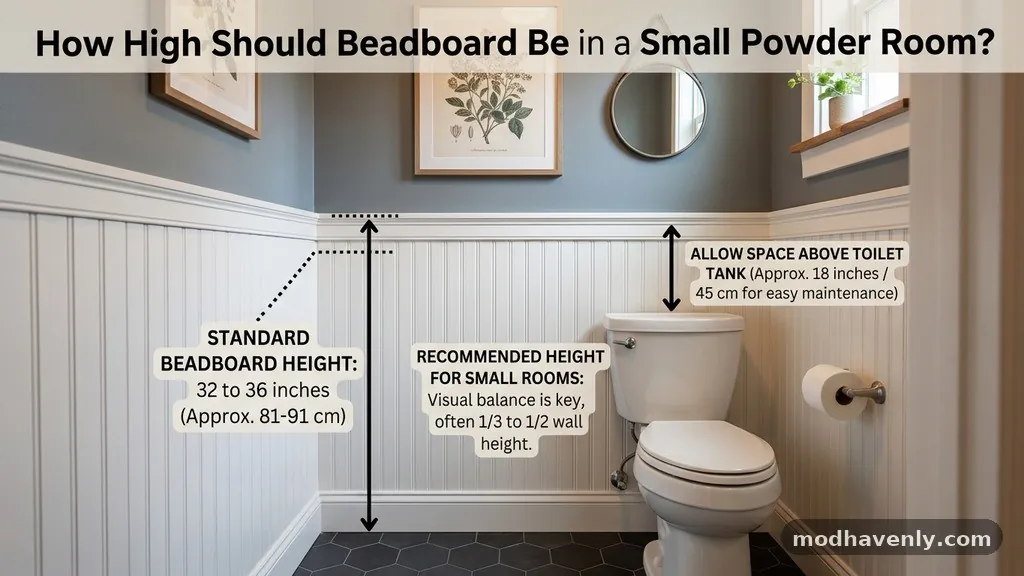
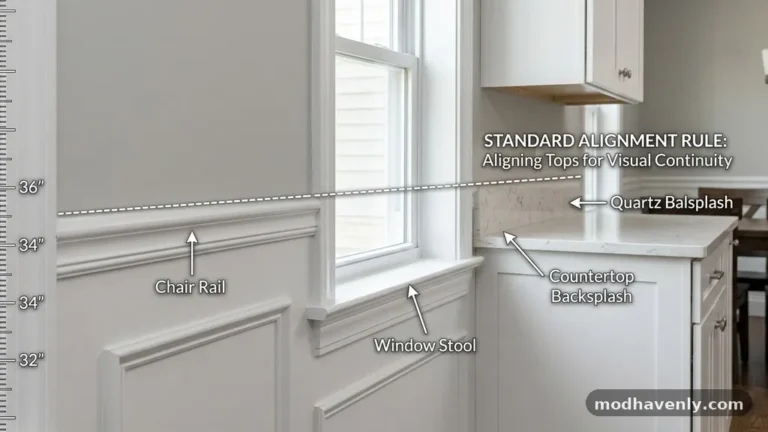
For most residential powder rooms, the industry standard for wainscoting or beadboard is 36 inches. This height is often referred to as the chair rail height, as it historically protected walls from the backs of dining room chairs.
In a bathroom, this measurement is functionally ideal because it typically sits just above the top of a standard toilet tank. When the beadboard clears the tank, it creates a clean horizontal line that makes cleaning behind the fixture significantly easier.
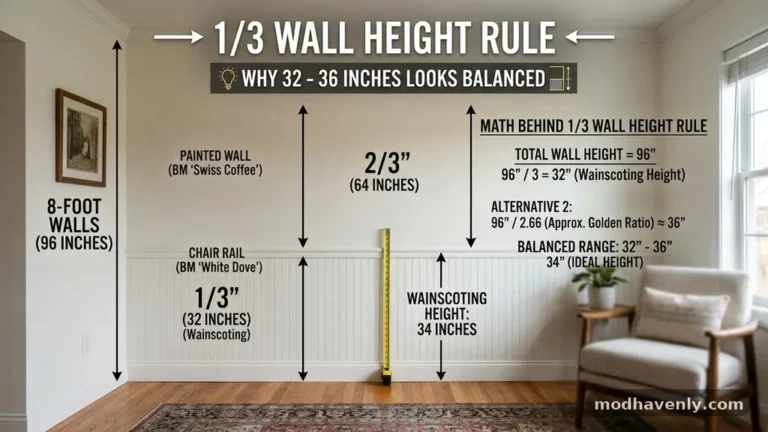
If you have higher ceilings or want a more dramatic architectural statement, you might consider pushing the height to 48 inches. This measurement is exactly one-half of a standard eight-foot wall, which creates a classic, balanced look.
Placing the top rail at the 48-inch mark provides more wall coverage, which is beneficial if you are worried about splashes or dings from high-traffic usage. However, be mindful that in an exceptionally small room, a higher rail can sometimes make the ceiling feel lower if the color contrast is too sharp.
Visual Proportions and Ceiling Height
The height of your ceiling dictates how high the beadboard should extend to maintain proper scale. In a room with standard 8-foot ceilings, a 36-inch to 42-inch installation is almost always the safest and most visually pleasing choice.
This leaves enough open wall space above the paneling to prevent the room from feeling like a boxed-in stall. You want the beadboard to act as a foundation for the room rather than a wall that consumes the entire vertical plane.
When working with taller ceilings, such as 9 or 10 feet, you have more flexibility to experiment. Some designers opt for a 5-foot or even 6-foot height in these instances to draw the eye upward and emphasize the volume of the space.
Always use a laser level to mark your line before cutting any material, as even a quarter-inch discrepancy will be glaringly obvious against the rigid lines of the beadboard. If you choose a taller installation, consider using a thinner, more refined molding at the top to avoid a heavy, chunky appearance.
Moisture Protection and Material Choice

Bathrooms are naturally humid environments, so the material you choose for your beadboard project is just as important as the height. Traditional wood beadboard can swell or rot if it is not properly sealed or if it sits directly on a damp floor.
Many modern homeowners now prefer PVC or composite beadboard for powder rooms because these materials are entirely impervious to water damage. Even if you prefer the look of wood, ensure that the bottom edge is sealed with a high-quality, paintable silicone caulk to prevent moisture from wicking up into the fibers.
Consider the following materials for your installation:
- PVC/Composite: Best for high-moisture areas; requires no special sealing and resists rot.
- MDF (Medium-Density Fiberboard): Affordable and smooth, but must be primed and painted on all sides to prevent swelling.
- Solid Wood: Offers the most authentic look but requires diligent maintenance and high-quality exterior-grade paint.
- Vinyl Paneling: A budget-friendly, easy-to-install option that is essentially waterproof.
Integrating the Toilet Tank
The toilet tank is the most significant obstacle when installing paneling in a small powder room. You have two main options: running the beadboard behind the tank or stopping it on either side.
Running the beadboard behind the toilet creates a seamless, built-in look that makes the room feel more custom and intentional. If you choose this route, you must account for the thickness of the beadboard, which is usually around 1/4 inch to 3/8 inch.
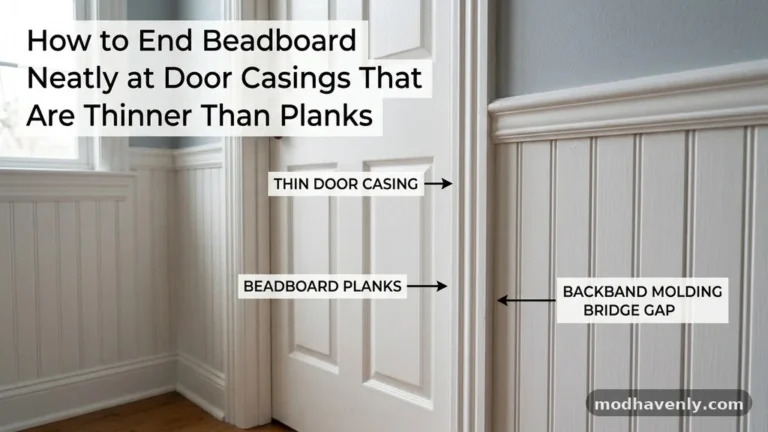
If you decide to stop the beadboard on either side of the toilet, you will need to finish the edges with a vertical trim piece or a “casing” to hide the exposed profile. This approach is often easier if you are working with an existing toilet that you do not want to remove.
However, it can create a small gap where dust and moisture might accumulate. If you are doing a full renovation, it is almost always better to remove the toilet, install the paneling, and then reinstall the toilet for a professional finish.
Color Strategies for Small Spaces
The color you choose for your beadboard dramatically affects how high the room feels. Painting the beadboard the same color as the wall above it creates a monochromatic, airy effect that makes small rooms appear larger.
If you want to create a high-contrast look, painting the beadboard a dark color and the upper wall a light, neutral tone can ground the room and add sophistication. Just remember that a dark color on the lower half will visually “cut” the room in half, which might make a tiny powder room feel even smaller.
Using a crisp white for the beadboard is a timeless choice that keeps the space feeling bright, especially in rooms without windows. If you use a bold wallpaper above the chair rail, keep the beadboard a simple, clean color to avoid overwhelming the eye. The goal is to create a cohesive design where the beadboard complements the other fixtures in the room rather than competing with them.
Comparing Installation Heights

Choosing the right height often comes down to the specific goals you have for the space. The table below outlines how different heights impact the functionality and feel of a small bathroom.
| Height | Best Use Case | Visual Impact |
|---|---|---|
| 32-36 inches | Standard pedestal sinks | Traditional, keeps walls feeling open |
| 40-42 inches | Modern vanity heights | Slightly more protection, balanced |
| 48 inches | High ceilings/Traditional wainscoting | Dramatic, classic, high coverage |
| 60+ inches | Very tall ceilings | Bold, architectural, formal |
Adding Hooks and Accessories
One practical advantage of choosing a height around 40 to 42 inches is the ability to install a sturdy top rail that can support hooks. In a small powder room, you might not have room for a towel bar, so using the top of the beadboard molding to hang a hand towel is a functional solution.
Ensure that your top rail is made of solid wood or high-density material if you plan to attach hardware to it. If the beadboard is purely decorative, you can use a thinner, lighter trim piece that sits flush against the wall.
When adding hooks, consider the placement relative to the toilet and the vanity. You don’t want the towel to hang in a way that interferes with the sink or makes the room feel cluttered.
Always pre-drill holes for your hooks to prevent the trim from splitting. A well-placed hook can turn a decorative wall treatment into a highly functional piece of bathroom furniture.
The Role of Molding and Trim
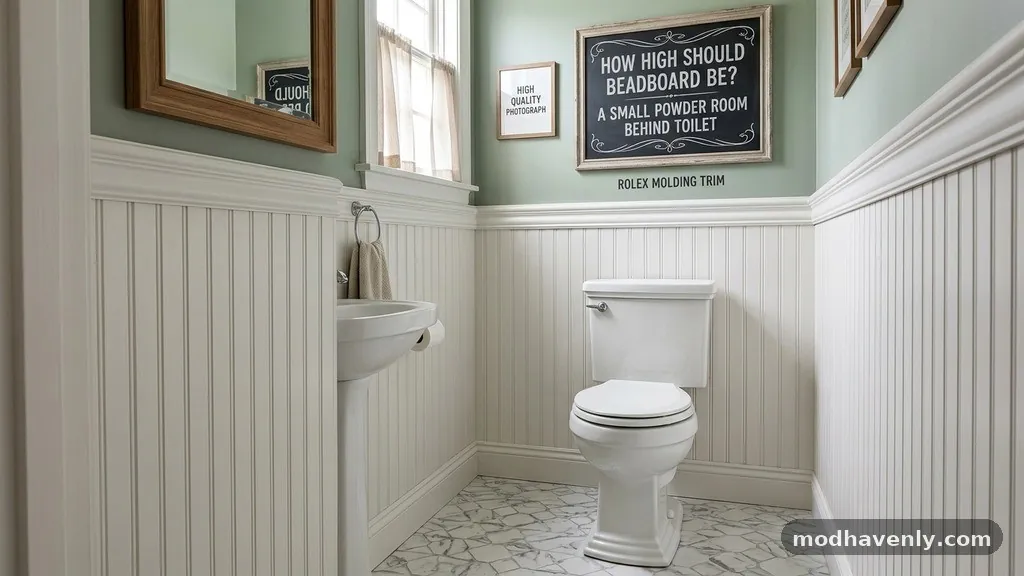
The molding you select for the top of the beadboard defines the entire aesthetic of the project. A simple, flat cap rail provides a modern, minimalist look that works well in contemporary homes.
If you are going for a more traditional or cottage-style vibe, a decorative chair rail with profiles and curves is the standard choice. The trim is what hides the transition between the beadboard and the drywall, so it must be installed with precision.
Always use a high-quality construction adhesive to secure the beadboard to the wall, followed by finish nails into the studs. If you are mounting the molding directly onto the drywall above the beadboard, make sure it is level across the entire room.
A slanted line, even if it is only off by a fraction of an inch, will be immediately noticeable when compared to the horizontal lines of the floor or the vanity. Use caulk to fill any gaps between the molding and the wall to ensure a smooth, paintable surface.
Maintenance and Long-Term Care
Once installed, beadboard requires minimal maintenance but should be kept clean to preserve its look. Because it is a vertical surface, it can collect dust in the individual grooves, especially in a small room where air circulation might be limited.
A quick pass with a vacuum brush attachment or a damp microfiber cloth is usually enough to keep it looking fresh. If you notice any chips in the paint, touch them up immediately to prevent moisture from penetrating the material.
If you have used MDF, be particularly careful during cleaning; never use excessive water, as it can cause the edges to swell. If you are using a high-gloss or semi-gloss paint, the surface will be more resistant to stains and easier to wipe down.
This is especially important behind the toilet, where accidental splashes are more likely to occur. A durable, moisture-resistant finish will keep your project looking new for years.
Common Mistakes to Avoid
Many homeowners rush the measuring phase and end up with a height that looks awkward relative to their plumbing fixtures. One common error is failing to account for the thickness of the baseboard when calculating the total height of the beadboard.
If you want the top rail to be 40 inches from the floor, and your baseboard is 4 inches tall, your beadboard panels should be 36 inches high to reach that target. Always measure from the finished floor level, not the subfloor, to get an accurate reading.
Another mistake is ignoring the placement of electrical outlets and light switches. You will likely need to cut the beadboard to fit around these fixtures, which can be tricky.
It is often easier to install the beadboard first, then use a jigsaw or oscillating multi-tool to create the cutouts before sliding the panels into place. Always turn off the power to the room before working around any electrical boxes to ensure your safety throughout the project.
Frequently Asked Questions
Should I use vertical or horizontal beadboard in a small powder room?
Vertical beadboard is the traditional choice and helps draw the eye upward, which can make a small room feel taller. Horizontal beadboard is a more modern, coastal, or farmhouse-style aesthetic that can make a narrow room feel wider. Choose the orientation that matches the overall style of your home, but keep in mind that vertical is generally easier to install and clean.
Can I install beadboard over existing tile?
It is generally not recommended to install beadboard directly over tile because the surface is uneven and difficult to bond to. You would need to remove the tile, repair the drywall, and then install the beadboard for the best results. If you must go over the tile, you would need to build a furring strip frame, which will significantly reduce the square footage of an already small powder room.
Does beadboard make a small room look smaller?
Not necessarily; in fact, it can often make a small room look more intentional and finished. If you keep the beadboard a light color or match it to the wall color, it adds texture without creating visual clutter. The key is to avoid using dark, heavy colors that might make the walls feel like they are closing in on you.
Is it necessary to remove the toilet for this project?
While you can technically cut the beadboard to fit around the toilet, removing it is the superior method for a professional result. Removing the toilet allows you to run the beadboard continuously behind the fixture, which looks cleaner and eliminates the need for awkward, visible seams. It is a relatively simple task for a DIYer, provided you have a new wax ring on hand for the reinstallation.
What type of paint should I use on bathroom beadboard?
Use a high-quality semi-gloss or satin finish paint that is specifically formulated for bathrooms. These paints contain additives that resist mildew and are easier to wipe down, which is essential for a room with high humidity and potential splashes. Always prime the surface first with a moisture-resistant primer, especially if you are using MDF, to ensure proper adhesion and long-term durability.
Conclusion
Deciding how high should beadboard be in a small powder room behind the toilet is a balance between personal style and the physical constraints of the space. By sticking to the standard 36-to-42-inch range, you ensure that your wainscoting remains functional, visually balanced, and proportional to your fixtures. Whether you are aiming for a classic, traditional look or a modern, clean aesthetic, the right height will elevate the room and provide necessary wall protection.
Take your time with the measurements, choose moisture-resistant materials, and don’t be afraid to take the toilet out to achieve that seamless, professional finish. With these steps, you can create a beautiful, durable space that enhances the value and charm of your home.