The 1/3 Wall Height Rule: Why 32 to 36 Inches Looks Balanced with 8-Foot Walls
Applying the 1/3 Wall Height Rule: Why 32 to 36 Inches Looks Balanced with 8-Foot Walls is a cornerstone of interior design that helps homeowners create visually harmonious spaces. By dividing a vertical surface into thirds, you establish a proportional foundation that prevents wall treatments from feeling overwhelming or stunted. For a standard 8-foot ceiling, this calculation lands precisely between 32 and 36 inches, providing an ideal anchor for wainscoting, board and batten, or chair rail installations.
Mastering these dimensions ensures your architectural details complement the room’s scale rather than competing with it. Understanding these proportions is the first step toward achieving a professional, polished look in any residential interior.
The Math Behind the 1/3 Wall Height Rule
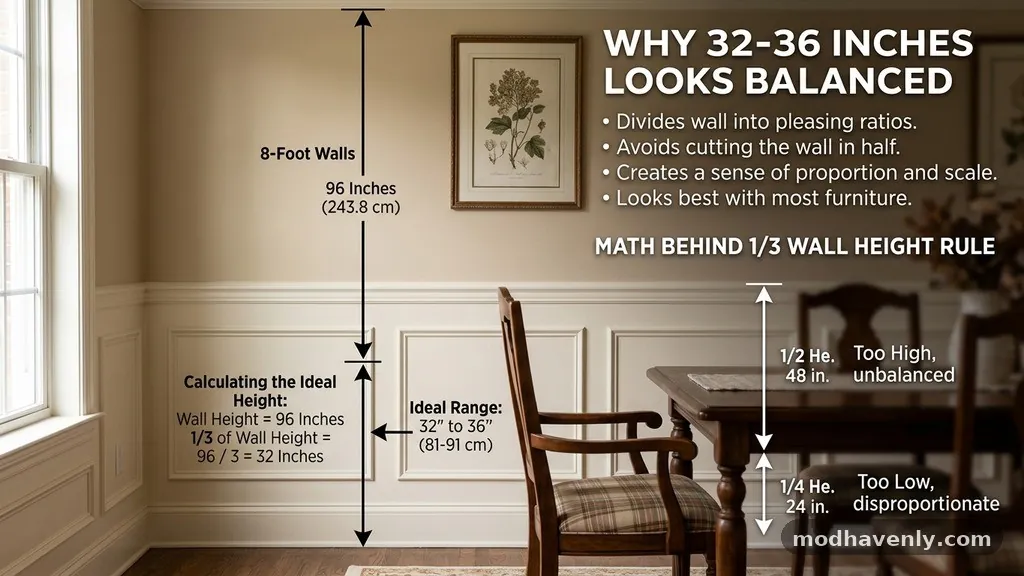
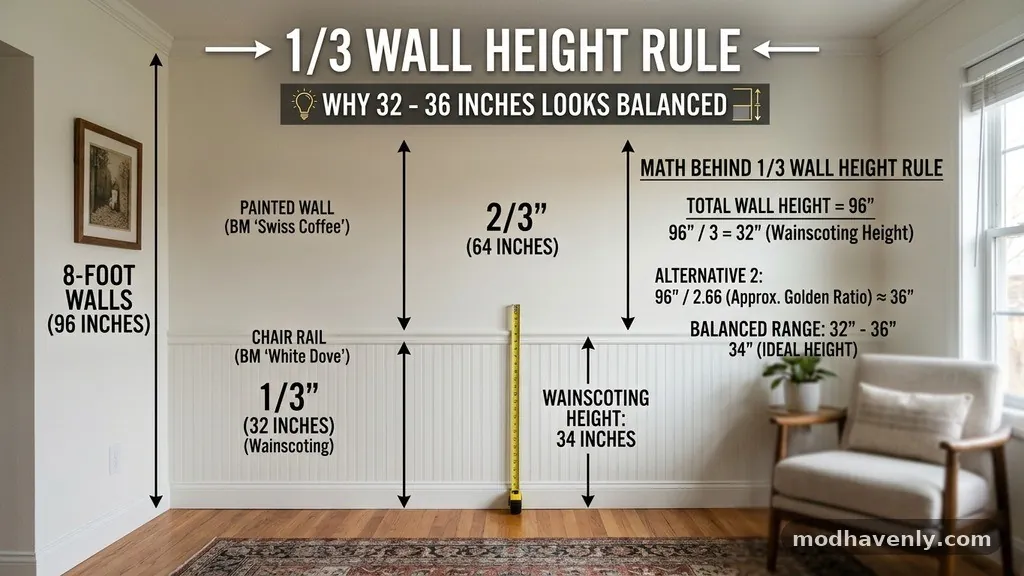
The logic behind this design principle is rooted in the golden ratio and the human eye’s preference for balanced vertical divisions. When you have a standard ceiling height of 8 feet, or 96 inches, dividing that space into three equal segments gives you 32 inches per section.
This specific measurement serves as the “bottom third” of the wall, where decorative treatments like wainscoting or beadboard naturally belong. By capping your wall treatment at this height, you create a clear visual anchor that grounds the room and provides a sense of stability.
When you push the height slightly higher, toward 36 inches, you are essentially adopting a more traditional, formal approach to the space. This 36-inch mark represents roughly 37.5% of the total wall height, which remains aesthetically pleasing while offering more wall protection for high-traffic areas.
Designers often prefer this range because it aligns perfectly with the standard height of a dining room table or a chair back. Using the 1/3 Wall Height Rule ensures that your architectural additions don’t accidentally cut the wall in half, which can make a room feel boxy or claustrophobic.
Visual Balance and Room Scale
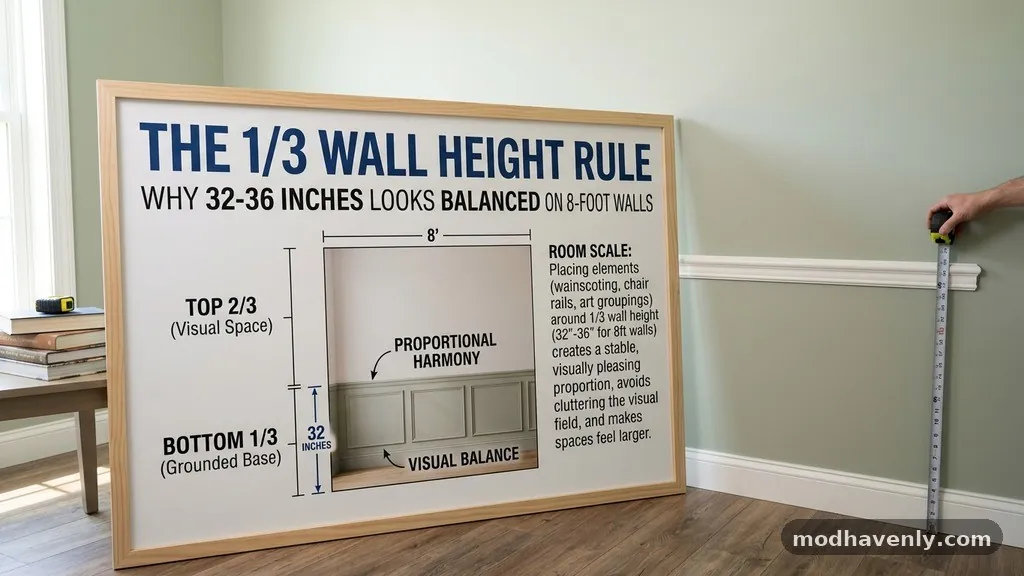
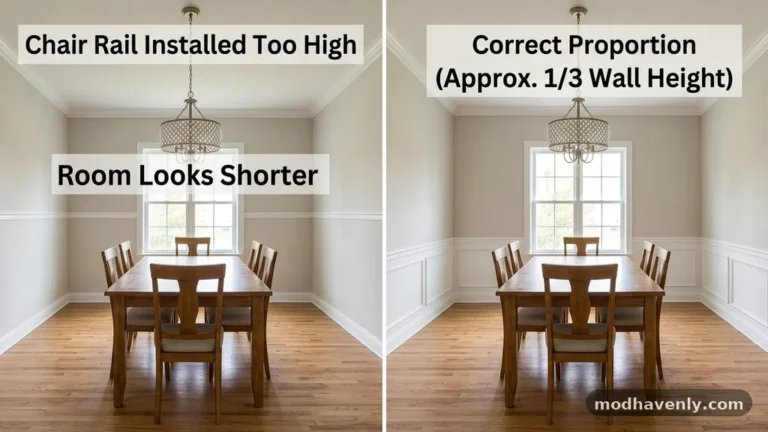
Achieving visual balance in a room depends heavily on how you treat the vertical plane. If you install wainscoting that is too short, the wall feels bottom-heavy and the upper section appears empty or neglected.
Conversely, installing panels that climb too high—such as 48 inches or more in an 8-foot room—can visually shrink the ceiling and make the space feel compressed. The 32 to 36-inch range acts as a “sweet spot” that allows the eye to travel comfortably from the floor to the ceiling without encountering jarring interruptions.
This balance is particularly important in small or narrow rooms, such as bathrooms or hallways. In these tighter quarters, the 1/3 Wall Height Rule prevents the wall treatment from overwhelming the limited floor space. By keeping the paneling at or below 36 inches, you maintain enough “breathing room” on the upper wall for paint colors, wallpaper, or artwork.
It creates a transition that feels intentional rather than forced. When you get these proportions right, the architectural elements seem to belong to the room’s original design, rather than appearing as an afterthought.
Applying the Rule to Wainscoting Heights
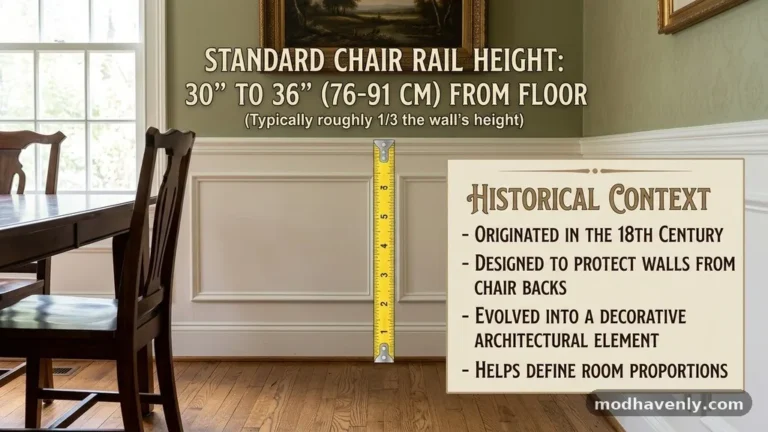
Wainscoting is perhaps the most common application for these height guidelines, as it serves both a functional and decorative purpose. Traditionally, wainscoting was used to protect plaster walls from the backs of chairs, which is why the term “chair rail” is still used today.
To maintain this classic look with 8-foot ceilings, you should aim for a total height—including the cap molding—of 32 to 36 inches. This height ensures that the chair rail is positioned at a functional level while maintaining the desired aesthetic proportions.
When installing beadboard or raised panels, the thickness of your baseboard and the crown of your rail must be factored into your final measurements. If your baseboard is 6 inches tall and your cap rail is 3 inches tall, you must account for these components within your 32-to-36-inch window.
Failing to consider the height of your trim pieces often leads to an installation that looks slightly off-center. Always measure from the finished floor level to the very top of your cap molding to ensure your total height adheres to the intended ratio.
Board and Batten Considerations
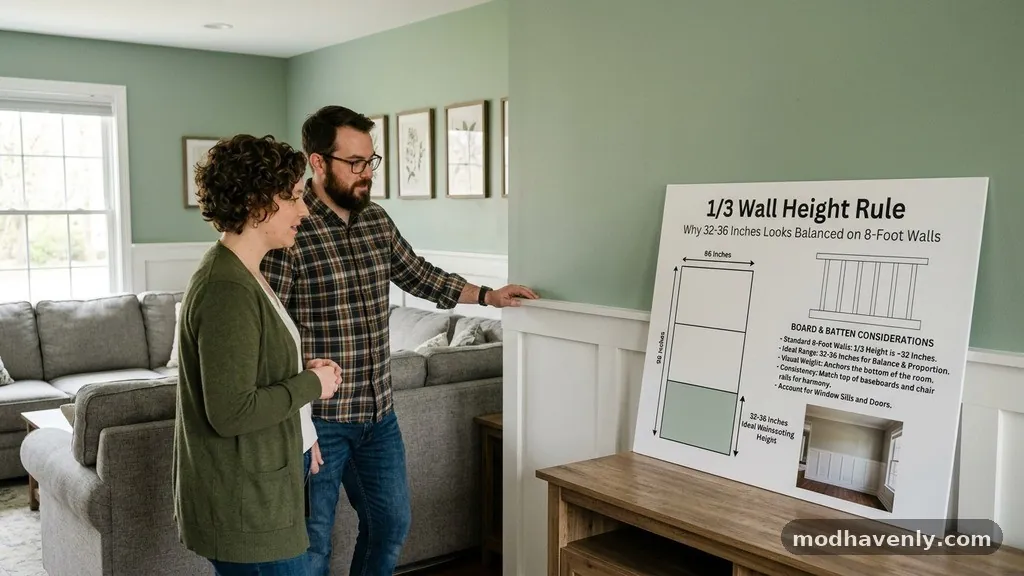
Board and batten is a popular, modern take on wall paneling that relies heavily on vertical lines to add texture to a room. Because the vertical battens draw the eye upward, getting the height right is critical to prevent the room from looking like a series of tall, thin stripes.
With 8-foot ceilings, the 1/3 Wall Height Rule is even more vital here than with traditional paneling. Keeping your horizontal rail at the 32-to-36-inch mark prevents the vertical battens from dominating the space and creating a cluttered, busy appearance.
Consider the spacing between your vertical battens when deciding between 32 and 36 inches. If you are using wider, more substantial boards, the 36-inch height often looks more balanced, as it provides enough room for the eye to appreciate the verticality of the design. If you prefer a thinner, more minimalist batten, the 32-inch height can feel more delicate and refined.
Always test your layout with painter’s tape before committing to a permanent installation. This simple step allows you to visualize how the specific height interacts with your furniture and door frames.
Standardizing Measurements for Different Rooms
While the 1/3 Wall Height Rule provides a reliable baseline, you may need to adjust slightly based on the specific function of the room. In a dining room, for example, your wainscoting height should ideally be just above the height of your chair backs to provide maximum protection.
If you have tall, formal dining chairs, a 36-inch height is usually the better choice. In a bathroom, where moisture protection is a priority, you might opt for the higher end of the spectrum to ensure the wall covering protects against splashes.
The following table provides a quick reference for how these measurements break down across common residential applications:
| Application | Recommended Height (inches) | Primary Design Benefit |
|---|---|---|
| Dining Room | 34–36 | Provides clearance for chair backs and visual formality. |
| Bathroom | 32–36 | Balanced protection against water and daily wear. |
| Hallway | 32–34 | Maintains an open feel in narrow transition spaces. |
| Living Room | 30–32 | Subtle architectural interest without dominating wall art. |
The Role of Baseboards and Cap Rails
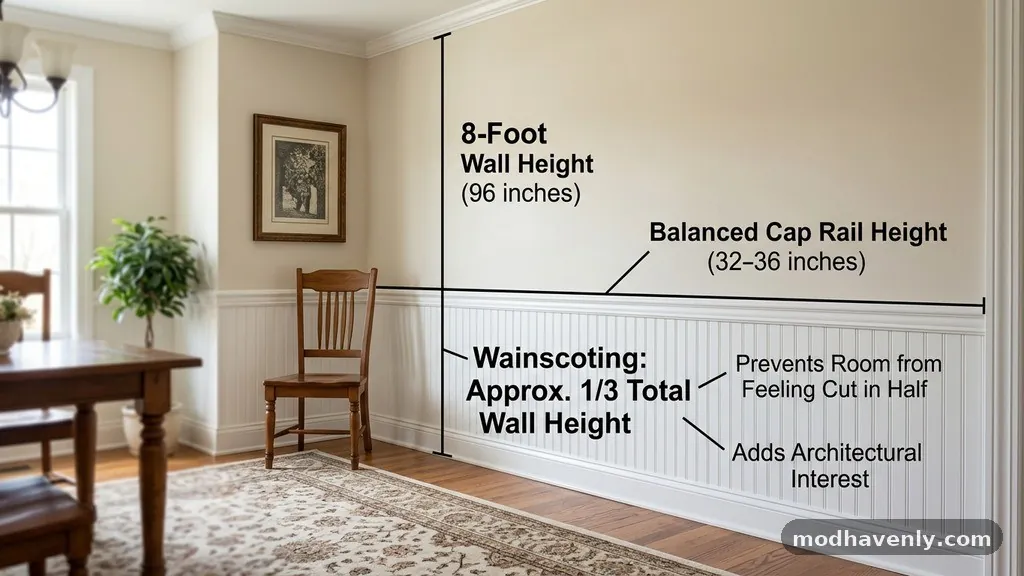
Your choice of baseboard and cap rail profiles will significantly influence the perceived height of your wall treatment. A tall, elaborate baseboard will make a 32-inch installation feel much more substantial than a thin, simple baseboard at the same height.
If you are working with a very tall baseboard, say 8 or 9 inches, you might find that 32 inches is the perfect total height to keep the proportions from feeling “heavy.” You can find more information on trim standards through organizations like the National Association of the Remodeling Industry, which provides resources on professional installation practices.
The cap rail—the piece of molding that sits on top of your panels—also plays a role in the “weight” of the design. A thick, decorative rail with multiple profiles adds visual density to the top of the paneling. If you use a heavy cap rail, you might prefer the 36-inch mark to ensure the wall doesn’t look too crowded.
Conversely, a simple, flat-profile cap rail allows for more flexibility and can work beautifully at the 32-inch mark. Always prioritize the visual weight of your chosen materials over a rigid adherence to a single number within the range.
Adjusting for Non-Standard Ceilings
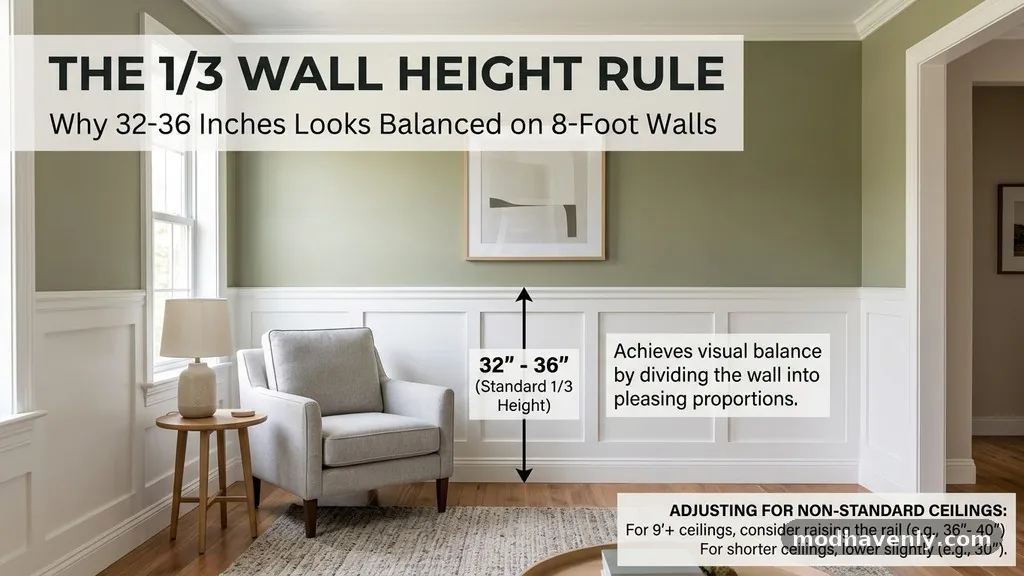
While 8-foot ceilings are the most common in modern residential construction, you may occasionally encounter spaces with 7-foot or 9-foot ceilings. The beauty of the 1/3 Wall Height Rule is that it is a ratio, not a fixed measurement. For a 7-foot ceiling (84 inches), one-third of the wall is 28 inches.
For a 9-foot ceiling (108 inches), one-third of the wall is 36 inches. This adaptive nature allows you to maintain consistent design logic regardless of the physical dimensions of the room.
When ceilings are lower than 8 feet, it is often safer to err on the side of a slightly lower height to avoid making the room feel like a basement. When ceilings are higher than 8 feet, you have more freedom to go toward the 36-inch mark or even slightly higher without losing the sense of balance.
However, keep in mind that the rule is meant to ground the room. If you go too high, you lose the “wainscoting” effect and start to enter the territory of full-wall paneling, which changes the character of the space entirely.
Common Mistakes in Wall Treatment Heights
One of the most frequent errors in interior design is placing the chair rail or panel cap at the exact halfway point of the wall. In an 8-foot room, this would be 48 inches, or 4 feet.
This “half-wall” look often feels awkward because it divides the vertical space into two equal parts, which creates a static, uninteresting visual. It also tends to make the ceiling feel lower than it actually is, as the eye is drawn to the midpoint rather than the top of the room.
Another mistake is ignoring the placement of electrical outlets and light switches. If your wainscoting height is set at 34 inches, you may find that it lands directly in the middle of your light switch plates. This requires moving the electrical boxes, which adds significant cost and labor to the project.
Always check your wall switches and outlets before finalizing your height. It is often better to adjust your panel height by an inch or two to avoid an expensive electrical rework.
Tools and Techniques for Accurate Installation
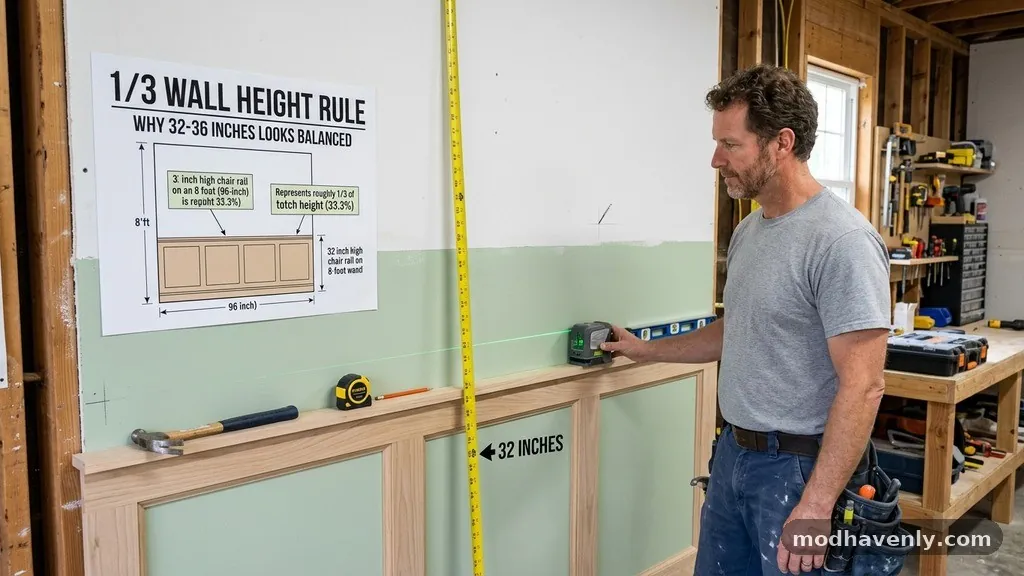
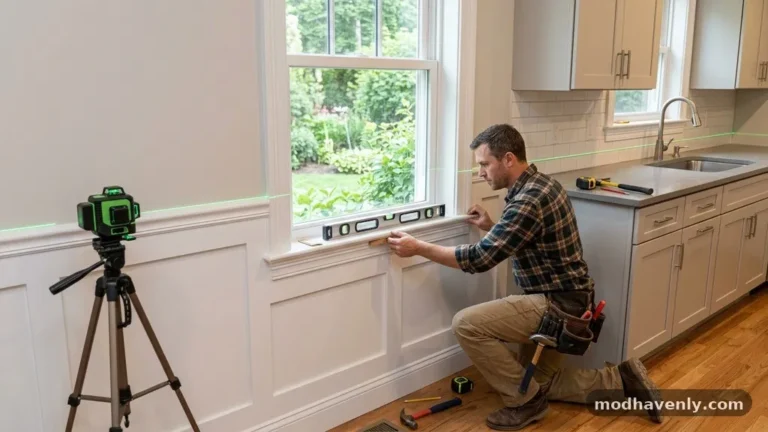
To achieve a professional finish, you need more than just a good eye; you need the right tools for measuring and leveling. A laser level is an indispensable piece of equipment when installing wainscoting or board and batten across an entire room.
It allows you to project a perfectly horizontal line at your chosen height, ensuring that your panels are consistent even if the floor itself is slightly out of level. Relying on the floor as your only reference point is a recipe for an uneven installation.
- Use a laser level to mark your desired height at multiple points around the room.
- Check for floor slope; if the floor drops 1 inch on one side, you will need to scribe your bottom boards.
- Use a stud finder to mark the location of studs before installing your battens or panels.
- Always cut your boards slightly longer than necessary and trim them to fit for a tight, seamless look.
- Use high-quality construction adhesive in addition to nails for a long-lasting, secure hold.
Frequently Asked Questions
Does the 1/3 rule apply to beadboard as well?
Yes, the 1/3 Wall Height Rule works perfectly for beadboard. Because beadboard has a repeating vertical pattern, keeping it at the 32-to-36-inch range ensures the pattern doesn’t become overwhelming. It creates a classic, cottage-style aesthetic that feels intentional and well-proportioned in an 8-foot room.
What if my baseboards are very tall?
If your baseboards are taller than 6 inches, you should measure from the top of the baseboard to the top of your cap rail to determine your “panel” height. If the total height including the baseboard is between 32 and 36 inches, you are still within the recommended range for a balanced look.
Should the chair rail match the window sill height?
Matching the chair rail to the window sill height is a classic design choice that creates a cohesive look. If your window sills are at 32 or 36 inches, aligning your wainscoting with them is highly recommended. It creates a seamless horizontal line that wraps around the entire room.
Can I go higher than 36 inches with 8-foot ceilings?
You certainly can, but you risk making the ceiling feel lower. If you go beyond 36 inches, you are essentially moving toward a “two-thirds” wall treatment, which is a different design style entirely. It is usually best to keep it under 36 inches to maintain the intended 1/3 ratio.
How do I handle outlets that land in the middle of the panels?
If an outlet lands in the middle of a panel, you have two choices: move the outlet or customize the panel. Moving the outlet is cleaner, but if that is not possible, you can install the panel around the outlet and use a box extender to bring the receptacle flush with the new, thicker wall surface.
Achieving Professional Results
The 1/3 Wall Height Rule remains a reliable guide for anyone looking to add architectural character to their home. By keeping your wall treatments between 32 and 36 inches in an 8-foot room, you create a sense of proportion that feels naturally right to the observer.
This range is not just a suggestion; it is a proven method for avoiding common design pitfalls like “half-wall” syndrome or compressed ceiling heights. Whether you are installing simple board and batten or intricate wainscoting, these measurements provide the framework for a successful project.
Take your time with the planning phase, using painter’s tape to map out your lines before picking up a saw. Pay close attention to how your chosen trim interacts with existing features like door casings and window sills.
When you respect the geometry of the room, the final result will look like a permanent, well-considered feature of your home. If you have questions about your specific room layout, feel free to measure your space, test your heights, and start building with confidence.