Aligning Chair Rail Height with Window Stools and Countertop Backsplashes
Aligning chair rail height with window stools and countertop backsplashes is a critical detail that transforms a chaotic wall into a cohesive, professional design. When you get these horizontal lines to meet, the entire room feels deliberate, intentional, and balanced. Many homeowners struggle with this because window heights and kitchen backsplashes rarely sit at the same elevation, forcing a choice between functional utility and visual continuity.
By understanding how to manipulate trim profiles and transition points, you can master the art of visual alignment. This article provides the specific measurements and design strategies needed to ensure your interior millwork creates a sense of harmony throughout your home.
The Standard Rule for Chair Rail Placement
The classic rule for installing a chair rail is to place it at approximately one-third of the wall’s total height. For a standard 8-foot ceiling, this translates to a measurement of roughly 30 to 36 inches from the floor.
This height was historically chosen to protect walls from the backs of chairs, but today it serves primarily as an aesthetic anchor. If you have 9-foot ceilings, you may find that pushing the rail toward the 36-inch mark creates a more grounded look.
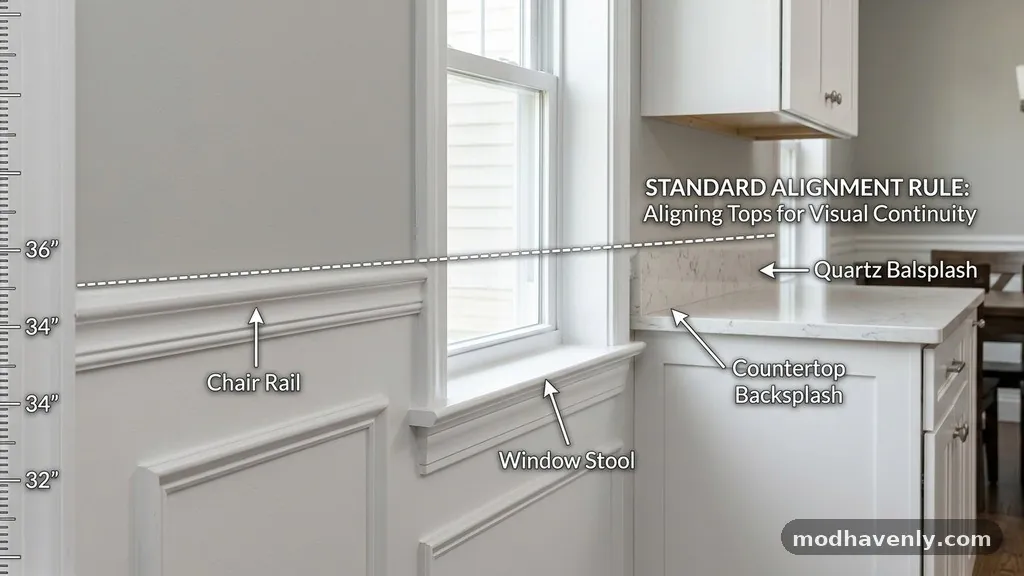
When you are aligning chair rail height with window stools and countertop backsplashes, the “one-third rule” often has to take a backseat to physical reality. If your window stool sits at 34 inches, forcing a chair rail to sit at 30 inches will create an awkward visual conflict.
It is almost always better to prioritize the alignment with existing architectural features rather than sticking to a rigid, arbitrary number. A chair rail that meets a window sill perfectly looks like a custom design choice, while one that misses by an inch looks like a measurement error.
Integrating Window Stools into Your Trim Plan
The window stool is the horizontal ledge at the bottom of the window frame, and it acts as a permanent horizontal datum line on your wall. When planning your trim, you should measure the distance from the finished floor to the bottom of the stool.
If this distance falls within the acceptable range for a chair rail, you have a perfect opportunity to create a continuous line. You can terminate the chair rail into the casing of the window or, if the profile allows, wrap it directly under the stool.
If the window stool is significantly higher or lower than your desired chair rail height, you have two primary options. First, you can adjust the chair rail up or down to match the stool exactly, ensuring the trim flows seamlessly around the room.
Second, you can treat the chair rail and the window stool as two separate layers, which is common in rooms with multiple windows of varying heights. However, in smaller rooms, keeping these elements aligned is the best way to prevent the space from feeling cluttered or visually fractured.
Balancing Kitchen Countertop Backsplashes
Kitchens present a unique challenge because the backsplash height is dictated by the countertop and the base cabinets. Standard countertops are usually 36 inches high, and a typical tile backsplash often extends 4 to 6 inches above that surface.
If you intend to run a chair rail through the kitchen or into an adjacent dining area, you must decide how it interacts with the backsplash. In many open-concept homes, the chair rail should transition smoothly into the edge of the backsplash tile.
To achieve this, you might need to select a chair rail profile that is thinner or lower in profile than the backsplash itself. If the backsplash is thick, such as a stone slab or thick subway tile, you can use a “transition piece” or a small block of wood to bridge the gap.
This prevents the chair rail from looking like it is crashing into the kitchen wall. Always prioritize the level line of the countertop; if the floor is slightly uneven, use the countertop as your reference for the chair rail height rather than the floor itself.
Measurement and Layout Strategies
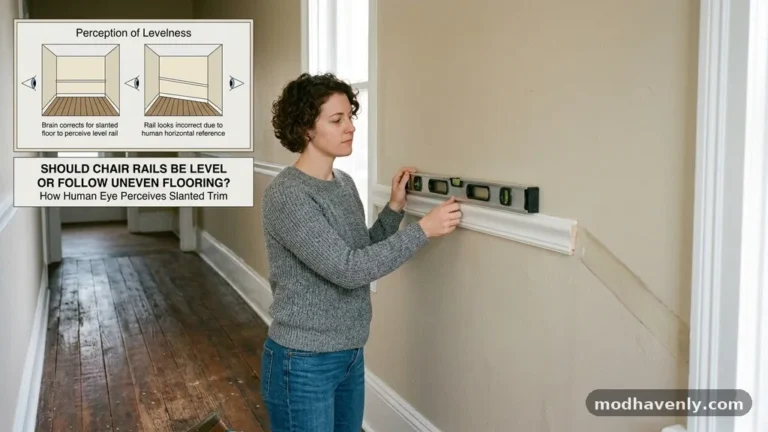
Accuracy is the foundation of any successful trim project, and you should never rely on a single measurement taken in one corner. Floors are rarely perfectly level, especially in older homes, so you should use a laser level to establish a constant horizontal plane around the entire room.
Once the laser line is projected, mark the height at every window and every wall segment. You will quickly see if your planned height intersects correctly with your window stools or potential backsplash zones.
If you find that your chair rail height will result in a “sliver” of wall space between the rail and the window stool, you should adjust the rail height immediately. A gap of less than two inches often looks like a mistake, while a gap of four inches or more looks intentional.
If the alignment is off by only a small fraction, it is often better to adjust the rail height to match the stool perfectly. You can learn more about standard architectural standards for home interiors through the National Institute of Building Sciences, which provides comprehensive building design guidelines.
Material Selection and Profile Matching
The profile of your moulding significantly influences how the alignment looks to the naked eye. A rounded or “bullnose” chair rail profile is more forgiving when transitioning into window casings than a sharp, squared-off profile.
If you are trying to match a window stool, ensure the thickness of the chair rail does not exceed the thickness of the stool’s apron. If the rail is thicker, it will stick out beyond the trim, creating a “proud” joint that catches dust and looks unfinished.
Consider the material you are using, as wood, MDF, and PVC all behave differently under a miter saw. MDF is excellent for painting and stays very straight, which is helpful if you are trying to maintain a long, perfectly level line across multiple walls.
If you are staining the trim, wood is the superior choice, but you must be careful with wood movement. Always cut your pieces slightly long and scribe them to fit against window casings to ensure there are no visible gaps at the transition points.
Dealing with Uneven Floors and Walls
It is a common frustration to discover that your floor drops an inch from one side of the room to the other. If you install your chair rail perfectly level according to a laser, it may appear “crooked” relative to the floor.
Conversely, if you follow the floor, the chair rail will be visibly out of level compared to your window stools. In most cases, you should prioritize the level line of the windows and cabinets over the floor.
To hide the resulting discrepancy at the floor level, you can adjust the height of the baseboard moulding. If the chair rail needs to be higher on one side to match a window, you can make the baseboard slightly taller on that same side to compensate.
This is a classic carpentry trick that keeps the room looking balanced and professional. Remember that the human eye is very sensitive to horizontal lines, so keeping your chair rail level is more important than keeping it equidistant from the floor.
Comparison of Trim Alignment Approaches
The following table outlines how different architectural features influence your decision-making when setting rail heights.
| Feature | Alignment Priority | Strategy |
|---|---|---|
| Window Stools | High | Match height exactly to avoid awkward gaps. |
| Backsplashes | Medium | Use transition blocks to bridge thickness differences. |
| Door Casings | Low | Terminate rail before the casing or wrap into it. |
| Floor Level | Low | Ignore floor slopes; prioritize horizontal level. |
Common Mistakes to Avoid
One of the biggest errors is failing to account for the thickness of the paint or the caulk when measuring. A 1/16th of an inch might seem negligible, but it becomes obvious when you are trying to butt two pieces of trim together at a window.
Always dry-fit your pieces before applying adhesive or nails. Another mistake is using the wrong adhesive for the wall surface, which can cause the rail to pull away over time, especially near heat sources like kitchen countertops.
Avoid “stair-stepping” your chair rail to accommodate different window heights in the same room. This creates a jagged, disjointed look that draws the eye to the inconsistency.
If you have windows at different heights, choose a single, consistent height for the chair rail that works for the majority of the windows. If a specific window is too low, you may need to install the rail underneath it and simply accept the visual separation.
Tools Required for Precision Installation
To achieve professional results when aligning chair rail height with window stools and countertop backsplashes, you need the right set of tools. A rotary laser level is almost mandatory for ensuring your line stays true across a large space.
A high-quality miter saw with a sharp blade is essential for the clean cuts required for wrapping trim around corners. You will also need:
- Digital angle finder for measuring non-square wall corners.
- Coping saw for creating tight joints where the rail meets the casing.
- Stud finder to ensure the rail is securely fastened to the wall framing.
- Wood filler and fine-grit sandpaper for seamless transitions at joints.
- Caulking gun with high-quality paintable acrylic latex caulk.
Frequently Asked Questions
How far up the wall should a chair rail go?
The standard height for a chair rail is between 30 and 36 inches, though it should always be adjusted to align with your specific window stools.
Does a chair rail make a room look bigger or smaller?
A chair rail can make a room feel more grounded and cozy, but if the room has low ceilings, placing the rail too high can make the walls feel compressed.
Does chair rail have to match baseboards?
It does not have to match, but they should share a similar design language or profile style to keep the room looking cohesive.
Is chair rail moulding considered outdated?
While it was once a staple of traditional design, it is still widely used in modern homes to add texture, protect walls, and create a sense of scale.
How do I handle corners that are not perfectly square?
Use a digital angle finder to measure the corner precisely and divide the angle by two to get your miter cut, or use a cope joint for a more professional finish.
Final Thoughts on Room Cohesion
Achieving a professional result when aligning chair rail height with window stools and countertop backsplashes requires patience and careful planning. By using a laser level to establish your datum lines and prioritizing the alignment of fixed architectural features, you can ensure your home’s trim looks like it was part of the original design. Do not be afraid to make minor adjustments to your baseboards or backsplash transitions to ensure the horizontal flow remains uninterrupted.
These details are what separate a DIY project from a high-end interior finish. If you take the time to measure twice and cut once, you will create a space that feels balanced, intentional, and perfectly proportioned. Feel free to experiment with different moulding profiles to find the look that best suits your home’s personality.