
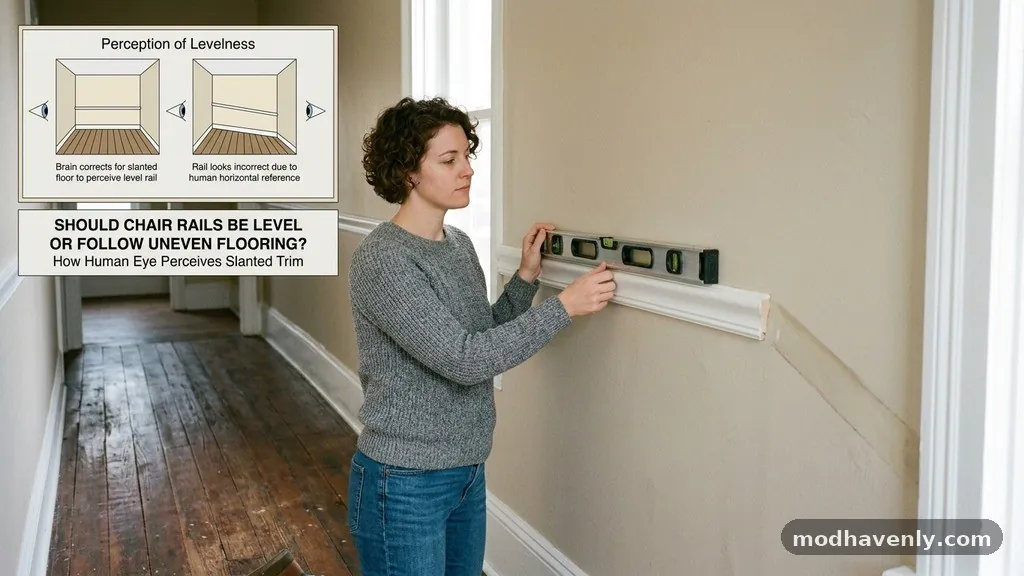
Should Chair Rails Be Level or Follow the Slight Slope of Uneven Flooring?
Determining whether your interior trim should be perfectly horizontal or match the pitch of your floor is a common dilemma in home renovation. Many homeowners find themselves asking if they should chair rails be level or follow the slight slope of uneven flooring The short answer is that chair rails should almost always be installed perfectly level, regardless of how much the floor dips or rises.
A level rail creates a visual anchor for the room, whereas following a slanted floor will make the entire space look crooked to the human eye. This article provides the technical justification and installation strategies for maintaining a consistent horizontal line in your home.
The Importance of a Level Reference Line
When you install molding in a room, you are establishing a new geometric standard for that space. If you follow the floor, you are essentially mimicking the structural failures of the building rather than correcting them. A chair rail is a horizontal architectural feature, and our eyes naturally scan for horizontal lines to gauge the stability of a room.
If your floor drops by half an inch across a ten-foot wall, a rail following that floor will look like a mistake. Guests will notice the slant immediately because it clashes with the vertical lines of door frames and corners. By keeping the rail level, you hide the floor’s imperfections behind furniture or baseboards instead of highlighting them.
How the Human Eye Perceives Slanted Trim
Our brain is highly sensitive to vertical and horizontal alignment. When we enter a room, we subconsciously compare the ceiling, the floor, and the trim against the plumb lines of the walls. A chair rail that slopes even slightly will create a sense of unease or “wrongness” that is hard to pin down.
This phenomenon is known as optical compensation. By forcing a level line, you are tricking the eye into believing the room is square, even if the floor tells a different story. If you allow the trim to tilt, you effectively confirm that the house is out of level, which makes the entire room feel unkept or poorly constructed.
Measuring and Marking the Level Baseline
Before you pick up a nail gun, you must establish a perfectly level baseline around the entire perimeter of the room. A standard spirit level is often too short to span large distances accurately. Instead, use a laser level to project a consistent horizontal line across every wall.
A laser level allows you to see how the rail will interact with other features, such as window sills or existing light switches. If your floor has a significant slope, you will notice the distance between your laser line and the floor changing as you move around the room. This is perfectly normal and expected in older homes.
Managing Variable Gaps at the Baseboard
Once you install the rail level, you will inevitably end up with a variable gap between the bottom of the rail and the floor. In areas where the floor dips, the rail will be higher off the ground. In areas where the floor humps, the rail will sit closer to the floor.
You can manage this discrepancy by focusing on the relationship between the rail and the rest of the wall. If you are planning to add wainscoting or paneling, the gap becomes even more noticeable. You may need to scribe the bottom of your panels or adjust the height of your baseboard to compensate for the floor’s inconsistencies.
Installation Strategy for Older Buildings
Working in an old building often means dealing with floor joists that have settled over decades. You might find that one corner of a room is two inches lower than the opposite corner. In these cases, you should prioritize the level line of the rail above all else.
If you attempt to follow the floor, the slope will compound as you move further away from your starting point. You will eventually reach a window or a doorway where the trim will look severely misaligned with the frame. Keeping the trim level ensures that your intersections with door casings remain clean and professional.
Comparing Level vs. Sloped Installation
It is helpful to weigh the visual outcomes of these two approaches. A level installation maintains the integrity of the room’s design, while a sloped installation often creates a chaotic visual experience. The following table highlights the primary differences in these two methods.
| Feature | Level Installation | Follow-the-Floor Installation |
|---|---|---|
| Visual Perception | Balanced and intentional | Crooked and sloppy |
| Difficulty | Requires laser tools | Easier to measure |
| Compatibility | Fits doors and windows | Clashes with frames |
| Professionalism | High aesthetic value | Low aesthetic value |
Tools Required for Precision
Achieving a perfectly level installation requires more than just a standard bubble level. You should invest in tools that minimize human error when measuring long runs of molding. Accuracy is the difference between a high-end finish and a DIY project that looks amateur.
* Self-leveling laser level: Essential for marking a continuous line around corners.
* Digital angle finder: Useful for checking the plumb of your corners.
* Coping saw: Necessary for clean joints where walls meet.
* Stud finder: Vital for ensuring the rail is anchored into the wall structure.
* Wood filler and caulk: Required for finishing the gaps created by uneven surfaces.
The Role of Wainscoting and Paneling
If you are installing wainscoting below your rail, the decision to keep the rail level is even more critical. Wainscoting consists of vertical boards or panels that emphasize the height of the wall. If the top rail is slanted, the vertical panels will have to be cut at different lengths.
This creates a “stair-step” effect that is incredibly difficult to hide. If your floor is uneven, you should install the rail level and then scribe the bottom of your wainscoting panels to fit the floor. This keeps the top of the wainscoting perfectly horizontal while ensuring the panels meet the floor flush.
Accounting for Window Sills and Door Casings
Your chair rail will likely intersect with window sills and door frames throughout the room. If your rail is level, it will hit these features at the same height consistently. If the rail is not level, you will find yourself in a situation where the rail hits the door casing on one side of the room but is an inch higher or lower on the other.
This creates an awkward transition that is impossible to trim out cleanly. Always use the bottom of your window sills as a secondary reference point. If the window sills themselves are not level, you may need to decide whether to prioritize the level of the room or the alignment with the windows.
Common Mistakes to Avoid
Many DIY installers make the mistake of using the floor as a starting point for their measurements. They assume that if they measure 36 inches up from the floor at every point, the result will be accurate. This is the primary reason why so many home projects end up looking uneven.
Another common error is failing to account for the thickness of the molding itself. When you mark your level line, remember that the top of the trim is what needs to be level, not the bottom. Always mark your reference line and then measure down to ensure your trim placement is consistent.
Frequently Asked Questions
Does a laser level really make a difference for short walls?
Yes, a laser level is superior to a bubble level because it eliminates the error that occurs when moving a tool across multiple surfaces. Even on a short wall, a laser provides a continuous reference that accounts for the entire room’s geometry.
What if the room is so uneven that the rail hits the baseboard in some spots?
If your floor is that uneven, you have a structural issue that goes beyond trim installation. In these cases, you might need to raise the baseboard or install a thicker floor transition piece to hide the gap. Never sacrifice the levelness of the rail to compensate for a floor that is drastically sloped.
Can I use a string line instead of a laser?
A string line is a traditional method, but it is prone to sagging and human error. It is difficult to get a string perfectly taut over a long distance without it dipping in the center. A laser is much more reliable for achieving a true horizontal line.
How do I handle corners if the wall is not plumb?
Corners are rarely perfectly 90 degrees in older homes. You should use a digital angle finder to measure the corner and then adjust your miter cuts accordingly. If the corner is significantly out of plumb, you might need to use a corner block to hide the joint.
Should I prioritize the window sill over the floor?
Yes, always prioritize the window sill and the door frames over the floor. These are permanent architectural features that your eye uses to judge the room. You can find more detailed advice on interior trim standards at the National Park Service Technical Preservation Services regarding historic restoration.
Refining Your Approach
The decision of whether you should chair rails be level or follow the slight slope of uneven flooring is ultimately a choice between structural honesty and visual harmony. While it might feel counterintuitive to ignore the floor, the human eye demands a level horizontal line to feel comfortable in a space. By using a laser level and carefully scribing your baseboards or panels, you can create a professional look that hides the flaws of an old house.
Focus on the intersections with door casings and window sills to ensure a consistent, clean finish. If you take the time to set your baseline correctly, your trim will provide the structure and elegance your room deserves, regardless of the condition of the floor beneath it.