Aligning Chair Rail Height with Window Stools and Countertop Backsplashes
Achieving a polished interior often comes down to the subtle geometry of your trim work. Specifically, aligning chair rail height with window stools and countertop backsplashes is a design choice that transforms a disjointed room into a cohesive space. When these horizontal lines meet, they create a visual anchor that guides the eye naturally across the walls.
Failing to consider these intersections can lead to a cluttered appearance where trim elements seem to fight for prominence. By carefully planning your installation, you ensure that every piece of wood serves a clear purpose. This approach simplifies your layout and provides a sense of intentionality that is immediately noticeable to any visitor.
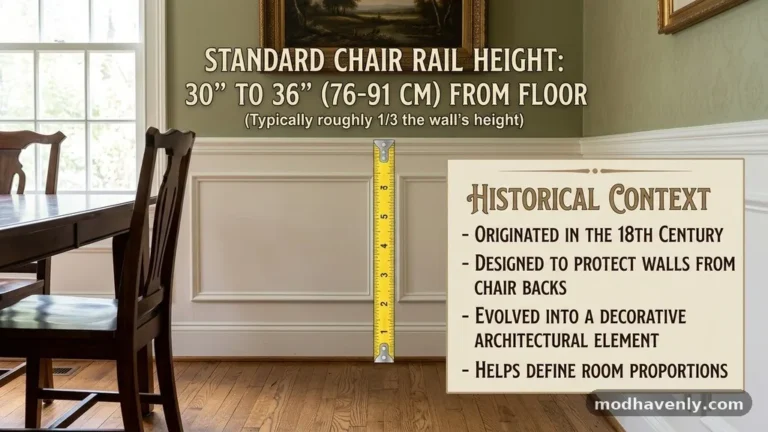
The standard height for a chair rail is traditionally set between 30 and 36 inches from the floor. To achieve a perfectly flush look, your chair rail should ideally align exactly with the bottom edge of your window stool. In kitchens or bathrooms, this same height should ideally match the top of your standard backsplash.
If your window stool sits at 32 inches, your chair rail should be installed at that same 32-inch mark to maintain a continuous horizontal plane. This alignment prevents the awkward “stair-stepping” effect that occurs when trim pieces meet at slightly different elevations. When all these elements share a common datum line, the room gains a professional, high-end feel.
The Mechanics of Horizontal Alignment

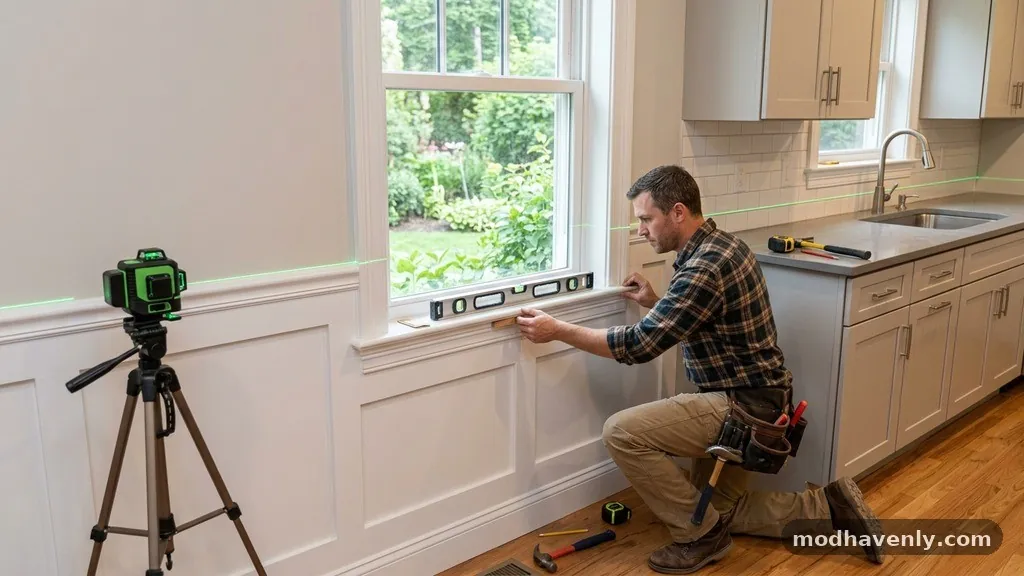
Maintaining a consistent horizontal line throughout a room requires more than just measuring from the floor. You must account for potential variations in your subfloor or flooring materials, which can shift the level of your baseboards and chair rail. Always use a laser level to mark your desired height across the entire perimeter of the space.
This tool ensures that your chair rail meets the window stool at the exact same elevation on every wall. If you rely solely on a tape measure from the floor, you might discover that your house has slight settling issues that throw off the alignment.
When you are aligning chair rail height with window stools and countertop backsplashes, the window stool often dictates the final placement of your rail. If your existing window stools are already installed, they act as the fixed point for your design. You must adjust the chair rail to meet the underside of the stool, which might mean deviating slightly from the traditional 32-inch recommendation.
If the window stool is significantly higher or lower than your target rail height, you have a few options for bridging the gap. You can either terminate the rail against the window casing or adjust the profile of the rail to create a smoother transition.
Integrating Backsplashes and Trim

Kitchens present a unique set of challenges because of the presence of permanent fixtures like cabinets and countertops. A standard countertop height is typically 36 inches, which is slightly higher than the traditional chair rail height. If you want to carry the chair rail line into the kitchen, you must decide whether to match the rail to the top of the backsplash or the countertop surface.
Matching the backsplash height is generally more visually pleasing because the backsplash is a secondary horizontal element that draws the eye. When the rail meets the backsplash, it creates a continuous line that wraps around the kitchen perimeter.
Consider the thickness of your backsplash material when planning your trim installation. A tile backsplash might be significantly thicker than a simple wood rail, requiring you to use a transition piece or a mitered return. If you are using a stone or quartz backsplash, you may need to butt the chair rail directly against the side of the backsplash panel.
This requires precise cutting to ensure there are no visible gaps between the wood and the stone. If the transition looks too abrupt, consider painting the trim to match the wall or the cabinetry to help it blend into the overall design.
Standard Measurements and Room Proportions
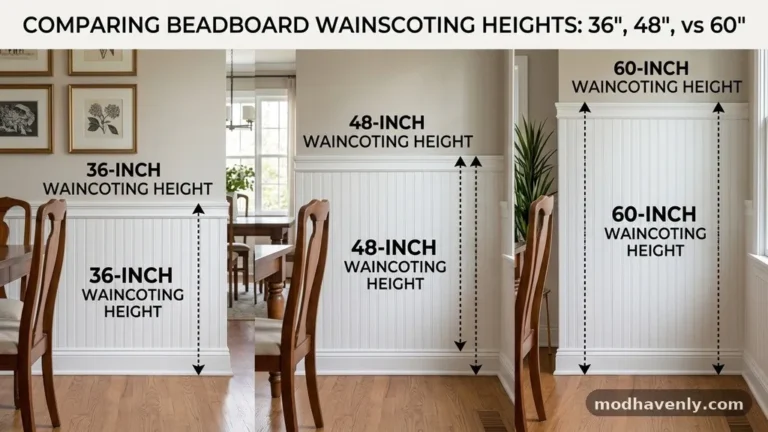
While there is no single law governing trim height, standard architectural practices have evolved over time to create a sense of balance. In rooms with standard 8-foot ceilings, a chair rail placed at roughly one-third of the wall height is the most common aesthetic choice. This usually lands between 30 and 34 inches, which aligns well with many window styles.
For higher ceilings, such as 9 or 10 feet, you can afford to push the rail slightly higher to maintain the correct visual proportions. If the rail is too low in a tall room, the wall space above it can feel empty and disjointed.
The following table provides a general reference for how different room elements interact with standard trim heights.
| Element | Typical Height from Floor | Design Consideration |
|---|---|---|
| Chair Rail | 30″ – 36″ | Adjust to match window stools. |
| Window Stool | 30″ – 34″ | Acts as a fixed reference point. |
| Countertop | 36″ | Standard height for kitchen work. |
| Backsplash | 4″ – 18″ | Align rail with the top edge. |
Managing Variations in Window Placement
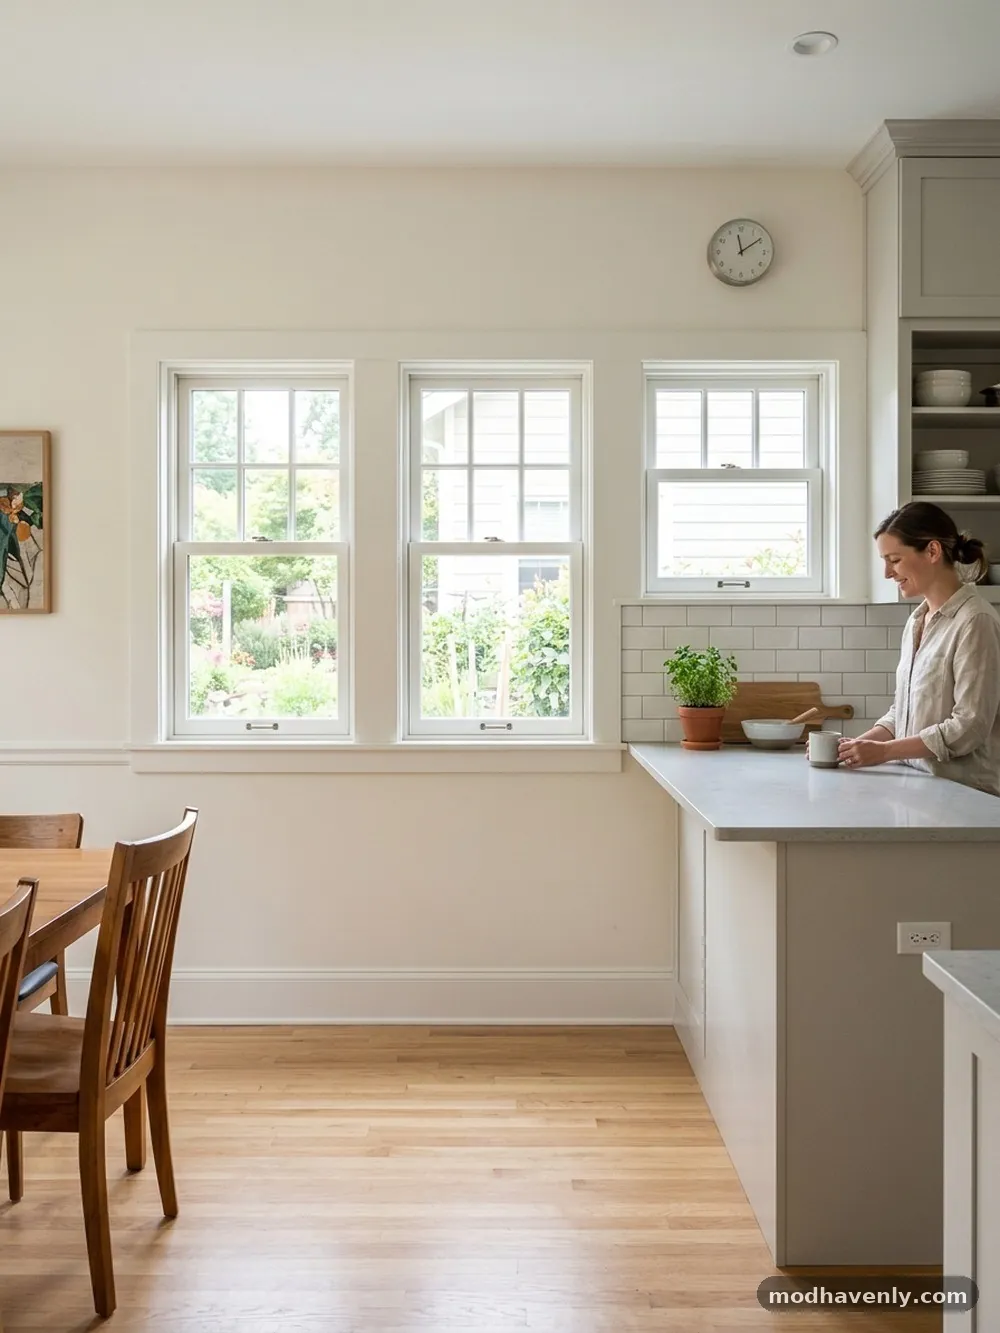
Not all windows are installed at the same height, and this is where many DIY projects encounter friction. If you have a room with windows at varying elevations, you face a significant design dilemma. You can either choose to ignore the window stools and maintain a perfectly level chair rail throughout, or you can allow the rail to step up or down to accommodate the windows.
The first option is usually cleaner, but it means the rail will not be flush with the stools. If you choose the second option, you must ensure the transitions are handled with decorative blocks or mitered returns.
When the rail must deviate from its path, use a corner block or a rosette to mark the change in direction. This provides a natural stopping point for the wood and makes the transition look like an intentional design feature rather than a mistake. If your windows are all at the same height but don’t match your preferred chair rail height, you might consider extending the stool itself.
By adding a small piece of trim or a custom-milled extension, you can visually connect the stool to the chair rail. This creates a custom look that feels like it was part of the original architectural plan.
The Role of Material Selection

The choice of wood or composite materials for your chair rail significantly impacts how it interacts with other surfaces. If you are working in a wet environment like a bathroom, moisture-resistant materials such as PVC or primed MDF are essential. These materials are also easier to work with when you need to make precise cuts to fit against a tile backsplash.
Wood, while traditional and beautiful, can expand and contract with humidity changes. This movement can sometimes cause small gaps to open up at the joints where the rail meets the window casing.
When choosing a profile, consider how the shape of the moulding will meet your other surfaces. A flat-backed profile is much easier to install against a window casing than a heavily contoured one. If you are trying to align the rail with a backsplash, a thinner profile is often better because it creates less of a visual ledge.
Remember that the goal is to create a sense of flow. Overly ornate or bulky trim can make a room feel smaller and more cluttered, especially when you are trying to connect multiple horizontal lines.
Tools and Techniques for Precision
Achieving a clean look when aligning chair rail height with window stools and countertop backsplashes requires a high degree of accuracy. You will need a reliable miter saw to handle the angled cuts required for corners and transitions. A laser level is non-negotiable for ensuring your horizontal lines are perfectly straight across different wall segments.
If you are working with long runs of trim, consider using a level that can be mounted on a tripod for hands-free operation. This allows you to mark your reference points while keeping your hands free for the actual installation.
Always perform a “dry fit” before you apply any adhesive or finish nails. This step allows you to verify that the rail meets the window stool or backsplash exactly where you intended. If you find a discrepancy, it is much easier to trim a small amount off the end of the rail than it is to fix a gap after the piece has been nailed into the wall.
For the most professional results, use a cope joint for inside corners. This technique creates a tighter, more seamless fit that won’t pull apart as the house settles over time. You can find detailed tutorials on these techniques at the National Park Service’s preservation guidelines for maintaining historic wood trim.
Addressing Outlets and Wall Obstacles

One of the most overlooked aspects of installing trim is the presence of electrical outlets and light switches. If your chair rail runs directly through the path of an outlet, you have to decide whether to move the outlet or cut the trim around it. Moving an outlet requires electrical work, which may be beyond the scope of a simple trim project.
If you choose to cut around the outlet, use a clean, square cut that butts up against the faceplate. You can then use a paintable caulk to fill any tiny gaps between the wood and the plastic plate.
If you have multiple obstacles on a wall, you might be better off adjusting the height of the chair rail to avoid them entirely. While it is nice to align the rail with your windows, it is not worth the effort of relocating plumbing or electrical boxes. Sometimes, a slight change in the rail height is the most practical solution.
You can still maintain a cohesive look by using the same trim profile throughout the room. The human eye is generally more forgiving of a slight height difference than it is of a poorly executed cut around an outlet.
Visual Impact of Trim Height

The height of your chair rail can drastically alter the perception of a room’s volume. A lower rail, placed around 30 inches, tends to make a room feel taller by emphasizing the vertical space above the rail. Conversely, a higher rail, placed closer to 40 inches, can make a large, cavernous room feel more intimate and grounded.
When you align this height with your window stools, you are effectively creating a “horizon line” in the room. This line acts as a visual break that can make a space feel more organized and less overwhelming.
Consider the color contrast between your walls and the trim. If you paint the trim a different color than the walls, you are highlighting the horizontal line. This makes the alignment with window stools and backsplashes even more critical because any error will be immediately visible.
If you paint the trim the same color as the walls, you create a more subtle, textural look. This approach is more forgiving of minor alignment issues and can help a room feel larger, as the trim doesn’t interrupt the visual flow as aggressively.
Troubleshooting Common Installation Issues
Even with the best planning, you might run into issues where the wall is bowed or the window casing is not perfectly plumb. A bowed wall can make it difficult to get a tight fit between the chair rail and the wall surface. Use a flexible construction adhesive in addition to finish nails to pull the trim tight against the wall.
If you find that the rail meets the window stool at an odd angle, you can use a small amount of wood filler or painter’s caulk to bridge the gap. Just remember that the goal is to make the transition look as smooth as possible.
Another common issue is the “stair-step” effect caused by baseboards or other trim pieces. If your chair rail doesn’t align with the window stool, you might try to terminate it with a decorative end cap or a small block. This creates a visual “stop” that signals to the eye that the line is ending for a specific reason.
Never try to force a piece of trim into a position that it doesn’t naturally want to sit in. This will only lead to bowed boards and gaps that are difficult to hide with paint.
Frequently Asked Questions
Does the chair rail have to be the exact same height as the window stool?
Ideally, yes, for the cleanest look. Aligning these two elements creates a continuous horizontal line that makes a room feel intentional and well-designed. If your window stools are at a non-standard height, you can often build up the stool with a small piece of trim to meet your desired chair rail height.
What should I do if my kitchen backsplash is higher than my chair rail?
You have two main choices. You can either raise the chair rail to match the top of the backsplash, or you can allow the rail to terminate at the edge of the kitchen cabinets. In most cases, terminating the rail at the cabinet edge is preferred as it avoids creating a “forced” alignment that might look awkward elsewhere in the room.
Does a chair rail make a room look bigger or smaller?
A chair rail can actually help a room feel more proportionate, especially in larger spaces. By breaking up the vertical expanse of a wall, it adds visual interest and a sense of scale. However, if the room is already very small or has low ceilings, a high chair rail can make the space feel cramped.
Can I install a chair rail if my walls are textured?
Yes, but you will need to be extra careful with your caulking. Textured walls make it harder to get a perfectly flush fit between the back of the trim and the wall. Use a high-quality, paintable acrylic caulk to seal the top and bottom edges of the rail, which will hide any gaps created by the wall texture.
What is the best way to handle corners when installing chair rail?
The best way to handle inside corners is with a cope joint, where one piece of trim is cut to fit the profile of the other. This creates a very tight, professional-looking corner that is less likely to open up over time. For outside corners, a standard 45-degree miter cut is the industry standard for a clean finish.
Aligning chair rail height with window stools and countertop backsplashes is a foundational skill for anyone looking to improve the interior of their home. By prioritizing these connections, you create a sense of order and intentionality that elevates the entire space.
Always remember to use a laser level for precision, and don’t be afraid to adjust your plans if the architecture of your house presents unique challenges. Whether you are working with custom wood moulding or modern composite materials, the principle remains the same: create a continuous, logical flow that guides the eye.
Taking the time to measure twice and plan your transitions will save you significant frustration during the installation process. Once the trim is secure and the caulk is painted, the result will be a cohesive room that looks like it was designed by a professional. If you find yourself stuck, focus on the most visible areas first and work your way toward the corners.
This methodical approach ensures that your hard work results in a beautiful, long-lasting update to your home. We invite you to share your own experiences with trim installation or reach out if you have further questions about specific room layouts.